No edit summary Tag: Visual edit |
m (Grammar check) Tags: Source edit Advanced mobile edit |
||
| (21 intermediate revisions by 15 users not shown) | |||
| Line 1: | Line 1: | ||
| − | '' |
+ | ''This page includes items you may find during gameplay which will help you progress and environmental hazards randomly placed on the map.'' |
==Pickup Details== |
==Pickup Details== |
||
| − | ''Pickup drop rate is different per [[Enemies|enemy]]. There's a '''modifier for the drop rate''' that changes depending on your ammo percentages. The modifier works per [[Weapons|weapon]], the values for the primary and secondary weapons are added together. In short low ammo will get you more pickups. In detail it works like this:'' |
+ | ''Pickup drop rate is different per [[Enemies|enemy]]. There's a '''modifier for the drop rate''' that changes depending on your ammo percentages. The modifier works per [[Weapons|weapon]], the values for the primary and secondary weapons are added together. In short, low ammo will get you more pickups. In detail, it works like this:'' |
| − | *''The default ammo drop modifier is 50% for primary and secondary |
+ | *''The default ammo drop modifier is 50% for primary and secondary weapons (50% + 50% = 100%).'' |
*''If your weapon's ammo is under 20% max ammo, the modifier for that weapon becomes 80%.'' |
*''If your weapon's ammo is under 20% max ammo, the modifier for that weapon becomes 80%.'' |
||
*''If the ammo is over 60% max ammo, the modifier for that weapon becomes 15%.'' |
*''If the ammo is over 60% max ammo, the modifier for that weapon becomes 15%.'' |
||
| − | *''Melee weapons are always |
+ | *''Melee weapons that require no ammo are always 15%.'' |
''For example:'' |
''For example:'' |
||
| − | *''Low ammo Laser Rifle, and a |
+ | *''Low ammo Laser Rifle, and a Sledgehammer? 80% + 15% = 95% normal amount of drops.'' |
*''Two bullet Weapons and near max bullets? 15% + 15% = 30% normal amount of drops.'' |
*''Two bullet Weapons and near max bullets? 15% + 15% = 30% normal amount of drops.'' |
||
*''A low and a high ammo weapon? 80% + 15% = 95% of the normal drops, forcing you to use the high ammo weapon, instead of just getting drops for the one that's low.'' |
*''A low and a high ammo weapon? 80% + 15% = 95% of the normal drops, forcing you to use the high ammo weapon, instead of just getting drops for the one that's low.'' |
||
| Line 16: | Line 16: | ||
''As you can see, this system is mainly there to reduce ammo when it is too high, not there to help too much when ammo is low, as it ranges from 30% to 160% (15% + 15% to 80% + 80%)''. |
''As you can see, this system is mainly there to reduce ammo when it is too high, not there to help too much when ammo is low, as it ranges from 30% to 160% (15% + 15% to 80% + 80%)''. |
||
| − | ''Rabbit Paw [[Mutations|mutation]] adds 40% to the total modifier.'' |
+ | ''The Rabbit Paw [[Mutations|mutation]] adds 40% to the total modifier.'' |
| ⚫ | |||
| − | ''Back Muscle [[Mutations|mutation]] raises your ammo capacity, but the game still uses normal capacity values to check how much ammo percentage you have.'' |
||
| ⚫ | '''''Drops being HP instead of ammo''' depends on your total health. The lower it is, the bigger the chance of a Mini Ammo Chest turning into a Mini Medkit, basically going from 0% to 66% as your health nears 0. It also means that you get more health drops when low on ammo. You calculate the chance (in percentage) of a Mini Ammo Chest turning into a Mini Medkit using the following formula: (66/Max HP) * (Max HP - HP) or 66 * (Missing Health%)'' |
||
| ⚫ | |||
| ⚫ | |||
| ⚫ | |||
| − | |||
| ⚫ | |||
*''For rads, it's ((from 5 to 6 seconds)*4)/(4+ number of loops)'' |
*''For rads, it's ((from 5 to 6 seconds)*4)/(4+ number of loops)'' |
||
*''For ammo, health and Portal Strike mini pickups it's ((from 6.7 to 7.7 seconds)*5)/(5+ number of loops)'' |
*''For ammo, health and Portal Strike mini pickups it's ((from 6.7 to 7.7 seconds)*5)/(5+ number of loops)'' |
||
| Line 42: | Line 40: | ||
![[File:SmallAmmoChest.png|centre]]<p style="text-align: center;">Mini Ammo Chest</p> |
![[File:SmallAmmoChest.png|centre]]<p style="text-align: center;">Mini Ammo Chest</p> |
||
| |
| |
||
| − | Dropped by [[Enemies|enemies]]. Gives ammo for either your primary or secondary [[Weapons|weapon]] (50/50 chance). Having full ammo or a melee weapon will give you ammo for a random type. Someone with a Sledgehammer and a Slugger picking up a mini chest will have a |
+ | Dropped by [[Enemies|enemies]]. Gives ammo for either your primary or secondary [[Weapons|weapon]] (50/50 chance). Having full ammo or a melee weapon will give you ammo for a random type. Someone with a Sledgehammer and a Slugger picking up a mini chest will have a 60% chance to get shells because of the slugger, and a 40% chance to get a different ammo type. |
| − | It gives 32 bullets, 8 shells, 7 bolts, 6 explosives or 10 energy. |
+ | It gives 32 bullets, 8 shells, 7 bolts, 6 explosives, or 10 energy. |
|- |
|- |
||
! |
! |
||
| Line 53: | Line 51: | ||
These chests give you twice the ammo contained in Mini Ammo Chests. Gives ammo for your current primary [[Weapons|weapon]]. Having full ammo for that weapon or holding a melee weapon causes it to give a random ammo type. |
These chests give you twice the ammo contained in Mini Ammo Chests. Gives ammo for your current primary [[Weapons|weapon]]. Having full ammo for that weapon or holding a melee weapon causes it to give a random ammo type. |
||
| − | It contains 2 Mini Ammo Chests inside, which grants 64 bullets, 16 shells, 14 bolts, 12 explosives or 20 energy. |
+ | It contains 2 Mini Ammo Chests inside, which grants 64 bullets, 16 shells, 14 bolts, 12 explosives, or 20 energy. |
|- |
|- |
||
![[File:PresentChest.png|centre]]<p style="text-align: center;">Present Ammo Chest</p> |
![[File:PresentChest.png|centre]]<p style="text-align: center;">Present Ammo Chest</p> |
||
| Line 59: | Line 57: | ||
There's a 1/4 chance that an Ammo Chest becomes a Present Ammo Chest. It can appear in each [[Areas|area]] besides 7-3. It will give you a generous amount of ammo for [[Weapons|weapons]] that you don't have equipped. |
There's a 1/4 chance that an Ammo Chest becomes a Present Ammo Chest. It can appear in each [[Areas|area]] besides 7-3. It will give you a generous amount of ammo for [[Weapons|weapons]] that you don't have equipped. |
||
| − | It contains 3 Mini Ammo Chests |
+ | It contains 3 Mini Ammo Chests; that's 96 bullets, 24 shells, 21 bolts, 18 explosives, or 30 energy. |
If a [[Pickups and Props#Special Props|portal]] spawns and opens the Present Chest, it'll give you 2 Mini Ammo Chests instead, but with ammo for your currently equipped weapons. |
If a [[Pickups and Props#Special Props|portal]] spawns and opens the Present Chest, it'll give you 2 Mini Ammo Chests instead, but with ammo for your currently equipped weapons. |
||
| Line 75: | Line 73: | ||
If you are carrying two [[Weapons#Cursed Weapons|Cursed Weapons]], [[Enemies|enemies]] have a 50% chance to drop this pickup instead of a regular Mini Ammo Chest. It emits purple smoke. |
If you are carrying two [[Weapons#Cursed Weapons|Cursed Weapons]], [[Enemies|enemies]] have a 50% chance to drop this pickup instead of a regular Mini Ammo Chest. It emits purple smoke. |
||
| − | Contains 1.5 times the ammo of a Mini Ammo Chest. It gives 48 bullets, 12 shells, |
+ | Contains 1.5 times the ammo of a Mini Ammo Chest. It gives 48 bullets, 12 shells, 10 bolts, 9 explosives, or 15 energy. |
| − | They fade 3 times faster than regular Mini Ammo Chests and instead of just disappearing, Cursed Mini Ammo Chests will explode, creating 3 closely packed small explosions that deal <span style="color:#FF4500">5-10</span> damage each. |
+ | They fade 3 times faster than regular Mini Ammo Chests, and instead of just disappearing, Cursed Mini Ammo Chests will explode, creating 3 closely packed small explosions that deal <span style="color:#FF4500">5-10</span> damage each. |
| − | They are not affected by the [[Mutations# |
+ | They are not affected by the [[Mutations#Plutonium Hunger|Plutonium Hunger]] mutation and are not pulled toward the player when the end-of-level portal opens. |
|} |
|} |
||
| Line 91: | Line 89: | ||
![[File:WeaponChest.png|centre]]<p style="text-align: center;">Weapon Chest</p> |
![[File:WeaponChest.png|centre]]<p style="text-align: center;">Weapon Chest</p> |
||
| |
| |
||
| − | Contains a [[Weapons|weapon]] and some ammo. The further you are in the run, the greater the chance for a more advanced weapon (check the [[Weapons#Weapon Chest drops table|Weapon Chest drops table]]). [[Robot]] will find more advanced weapons earlier than other characters. |
+ | Contains a [[Weapons|weapon]] and some ammo (2 Mini Ammo Chest pickups). The further you are in the run, the greater the chance for a more advanced weapon (check the [[Weapons#Weapon Chest drops table|Weapon Chest drops table]]). [[Robot]] will find more advanced weapons earlier than other characters. |
|- |
|- |
||
![[File:Chest_bigweapons.png|centre]]<p style="text-align: center;">Large Weapon Chest</p> |
![[File:Chest_bigweapons.png|centre]]<p style="text-align: center;">Large Weapon Chest</p> |
||
| Line 97: | Line 95: | ||
Contains 3 [[weapons]] and a large amount of ammo for those weapons (2 Mini Ammo Chest pickups for each weapon). |
Contains 3 [[weapons]] and a large amount of ammo for those weapons (2 Mini Ammo Chest pickups for each weapon). |
||
| − | If you leave a regular Weapon Chest unopened, there's a 25% chance for a Large Weapon Chest to |
+ | If you leave a regular Weapon Chest unopened, there's a 25% chance for a Large Weapon Chest to replace a regular Weapon Chest on the next level. The chance adds up for every skipped Weapon Chest, so not opening 4 Weapon Chests in a row guarantees that the 5th one will be a Large Weapon Chest. It cannot spawn at 7-3, however. |
The spawn chance doesn't reset if you open a regular Weapon Chest after leaving one unopened. Skipping a Large Weapons Chest adds the same 25% chance as skipping a regular one. Only opening the Large Weapon Chest resets the spawn chance back to 0%. |
The spawn chance doesn't reset if you open a regular Weapon Chest after leaving one unopened. Skipping a Large Weapons Chest adds the same 25% chance as skipping a regular one. Only opening the Large Weapon Chest resets the spawn chance back to 0%. |
||
| Line 119: | Line 117: | ||
The Proto Chest contains a [[Weapons#Regular|Rusty Revolver]] and can act as a storage for the [[Weapons|weapon]] you swap with the Rusty Revolver. |
The Proto Chest contains a [[Weapons#Regular|Rusty Revolver]] and can act as a storage for the [[Weapons|weapon]] you swap with the Rusty Revolver. |
||
| − | If you leave a weapon inside, it will be there when you find the Proto Chest again even with a different [[Characters|character]], in a different playthrough. It can also be used for storing character-exclusive weapons like the [[Weapons#Golden Weapons|Golden Revolver]], [[Weapons# |
+ | If you leave a weapon inside, it will be there when you find the Proto Chest again, even with a different [[Characters|character]], in a different playthrough. It can also be used for storing character-exclusive weapons like the [[Weapons#Golden Weapons|Golden Revolver]], [[Weapons#Regular 2|Chicken Sword]], [[Weapons#Regular 2|Black Sword]], or the [[Weapons#Regular 2|Guitar]], otherwise obtainable by other characters only in co-op mode. |
| − | If, however, you instead leave it without a weapon inside of it, the next time it is opened it will contain a [[Weapons#Regular|Rusty Revolver]]. |
+ | If, however, you instead leave it without a weapon inside of it, the next time it is opened, it will contain a [[Weapons#Regular|Rusty Revolver]]. |
| − | Weapons stored inside also carry over to other game modes. The chest will have the same weapon if you play on Normal Mode, [[Other Game Features#Hard Mode|Hard Mode]] or [[Other Game Features#Local Co-op|Co-op]]. However, it will not transfer over weapons from a [[Other Game Features#Daily Runs|Daily]] or [[Other Game Features#Weekly Runs|Weekly Run]]. |
+ | Weapons stored inside also carry over to other game modes. The chest will have the same weapon if you play on Normal Mode, [[Other Game Features#Hard Mode|Hard Mode]], or [[Other Game Features#Local Co-op|Co-op]]. However, it will not transfer over weapons from a [[Other Game Features#Daily Runs|Daily]] or [[Other Game Features#Weekly Runs|Weekly Run]]. |
The Proto Chest will contain a [[Weapons#Regular|Rusty Revolver]] during [[Other Game Features#Daily Runs|Daily]] and [[Other Game Features#Weekly Runs|Weekly Runs]]. |
The Proto Chest will contain a [[Weapons#Regular|Rusty Revolver]] during [[Other Game Features#Daily Runs|Daily]] and [[Other Game Features#Weekly Runs|Weekly Runs]]. |
||
| − | Since the Proto Chest is classified as a Chest the [[Crowns|Crown of Hatred]] can be used to gain rads from the chest infinitely by opening and closing it again so long as you have the hp to do so. This can also be paired with the [[Crown Guardian]] and its attack which can be used to farm for the infinite hp necessary to |
+ | Since the Proto Chest is classified as a Chest, the [[Crowns|Crown of Hatred]] can be used to gain rads from the chest infinitely by opening and closing it again so long as you have the hp to do so. This can also be paired with the [[Crown Guardian]] and its attack, which can be used to farm for the infinite hp necessary to utilize this exploit to the fullest extent. |
|} |
|} |
||
| Line 150: | Line 148: | ||
Contains 2 Mini Medkits inside. Restores 4 HP. |
Contains 2 Mini Medkits inside. Restores 4 HP. |
||
| − | Walking over a Medkit while playing as [[Chicken]] will also recover one max HP. |
+ | Walking over a Medkit while playing as [[Chicken]] will also recover one lost max HP. |
|} |
|} |
||
==Radiation== |
==Radiation== |
||
| − | ''Radiation is the experience of Nuclear Throne. When you collect a certain amount you will level up. As you enter a [[Pickups and Props#Special Props|portal]] you will be able to choose a [[Mutations|mutation]]. To level up you need to get 60 rads multiplied by your current level number, which means the number of Rads required increases with the level of the character (60, 120, 180, etc.). The game allows players to reach level 9 which means a total of 8 mutations ( |
+ | ''Radiation is the experience of Nuclear Throne. When you collect a certain amount, you will level up. As you enter a [[Pickups and Props#Special Props|portal]] you will be able to choose a [[Mutations|mutation]]. To level up, you need to get 60 rads multiplied by your current level number, which means the number of Rads required increases with the level of the character (60, 120, 180, etc.). The game allows players to reach level 9, which means a total of 8 mutations (or 9 mutations if you take the [[Crowns#Crown of Destiny|Crown of Destiny]], 10 if you also picked [[Mutations#Patience|Patience]]) + 1 more if you go over level 9 and pick an [[Mutations#Ultra Mutations table|Ultra Mutation]]. Radiation is also used as ammo for [[Weapons#Ultra Weapons|Ultra Weapons]] and [[Horror]]'s active.'' |
{| class="article-table" cellpadding="1" cellspacing="1" border="3" |
{| class="article-table" cellpadding="1" cellspacing="1" border="3" |
||
|- |
|- |
||
| Line 195: | Line 193: | ||
[[File:Rogue_Ammo.png|center]] |
[[File:Rogue_Ammo.png|center]] |
||
<p style="text-align: center;">Portal Strike Ammo Canister</p> |
<p style="text-align: center;">Portal Strike Ammo Canister</p> |
||
| ⚫ | |It contains one Portal Strike Ammo Crate. Replaces the Radiation Canisters if you're playing as [[Rogue]]. Walking over it gives one ammo for her active ability. The canister can't be damaged, but it's affected by the level ending [[Pickups and Props#Special Props|portals]]. If you are playing co-op and someone other than Rogue touches it, it will explode. |
||
| − | | |
||
| − | It contains one Portal Strike Ammo Crate. |
||
| ⚫ | |||
| style="text-align: center;" | - |
| style="text-align: center;" | - |
||
|- |
|- |
||
! style="text-align: center;" |[[File:Portal_Strike_Crate.png|center]]Portal Strike Ammo Crate |
! style="text-align: center;" |[[File:Portal_Strike_Crate.png|center]]Portal Strike Ammo Crate |
||
| |
| |
||
| − | Each crate gives one Portal Strike ammo if you're playing as [[Rogue]]. It's only seen when a level ending [[Pickups and Props# |
+ | Each crate gives one Portal Strike ammo if you're playing as [[Rogue]]. It's only seen when a level ending [[Pickups and Props#Special Props|portal]] spawns next to a Portal Strike Ammo Canister. |
| style="text-align: center;" | - |
| style="text-align: center;" | - |
||
|} |
|} |
||
| Line 251: | Line 247: | ||
*''[http://en.wikipedia.org/wiki/The_Mysterious_Island The Mysterious Island]'' |
*''[http://en.wikipedia.org/wiki/The_Mysterious_Island The Mysterious Island]'' |
||
*''[http://en.wikipedia.org/wiki/Enter_the_Dragon Enter the Dragon]'' |
*''[http://en.wikipedia.org/wiki/Enter_the_Dragon Enter the Dragon]'' |
||
| + | In rare cases, instead of a movie, the TV will display the mascot of [https://twitter.com/YellowAfterlife YellowAfterlife], a notable programmer of the game. |
||
| style="text-align: center;" |HP: 1 |
| style="text-align: center;" |HP: 1 |
||
|- |
|- |
||
| Line 277: | Line 274: | ||
A mysterious skull sometimes found in the [[Desert]]. |
A mysterious skull sometimes found in the [[Desert]]. |
||
| − | Prior to update #47, the Skulls looked like [[Removed/ |
+ | Prior to update #47, the Skulls looked like [[Removed/Changed Content#Props 2|this]]. |
<div class="mw-collapsible mw-collapsed" data-expandtext="Show Spoiler" data-collapsetext="Hide Spoiler"> |
<div class="mw-collapsible mw-collapsed" data-expandtext="Show Spoiler" data-collapsetext="Hide Spoiler"> |
||
| Line 283: | Line 280: | ||
<div class="mw-collapsible-content"> |
<div class="mw-collapsible-content"> |
||
| − | At the start of a level, the Skull's jaw remains open. If you kill more than 2% of [[Enemies|enemies]] on 1-1 |
+ | At the start of a level, the Skull's jaw remains open. If you kill more than 2% of the [[Enemies|enemies]] on 1-1 or 1-2 or 10% of the enemies on 1-3, the jaw will close. This only indicates if opening a portal to the [[Oasis]] secret area is still possible. |
</div> |
</div> |
||
</div> |
</div> |
||
| Line 316: | Line 313: | ||
| style="text-align:center;" |Explosive |
| style="text-align:center;" |Explosive |
||
| |
| |
||
| − | Can be found in the [[Scrapyard]] area. Similar to the Explosive Barrel but takes more damage to explode. Very big explosion radius. |
+ | Can be found in the [[Scrapyard]] area. Similar to the Explosive Barrel, but takes more damage to explode. Very big explosion radius. |
Will explode if the portal spawns on or near it. If your character is being pulled by the portal, the explosion can still damage you. It will do no damage if your character is inside the portal's sprite. |
Will explode if the portal spawns on or near it. If your character is being pulled by the portal, the explosion can still damage you. It will do no damage if your character is inside the portal's sprite. |
||
| Line 324: | Line 321: | ||
| style="text-align:center;" |Explosive |
| style="text-align:center;" |Explosive |
||
| |
| |
||
| − | A suspicious wreck found on area 3-1. Explodes like a regular Car Wreck when destroyed but has higher durability and a bigger explosion. Can explode upon portal spawns as the regular Car Wrecks would. |
+ | A suspicious wreck found on area 3-1. Explodes like a regular Car Wreck when destroyed, but has higher durability and a bigger explosion. Can explode upon portal spawns as the regular Car Wrecks would. |
<div class="mw-collapsible mw-collapsed" data-expandtext="Show Spoiler" data-collapsetext="Hide Spoiler"> |
<div class="mw-collapsible mw-collapsed" data-expandtext="Show Spoiler" data-collapsetext="Hide Spoiler"> |
||
| Line 339: | Line 336: | ||
|A stationary turret that sprays fire horizontally and vertically. Only appears in the [[Scrapyard]] levels. |
|A stationary turret that sprays fire horizontally and vertically. Only appears in the [[Scrapyard]] levels. |
||
| − | The fire does <span style="color:#FF8C00">1</span> damage per hit animation. It doesn't damage enemies, only the player, but enemies will block the flames. The Boiling Veins [[Mutations|mutation]] prevents damage from Fire Traps when under 4 health. |
+ | The fire does <span style="color:#FF8C00">1</span> damage per hit animation. It doesn't damage enemies, only the player, but enemies will block the flames. The Boiling Veins [[Mutations|mutation]] prevents damage from Fire Traps when under 4 health. However, it will still make the burning sound effect upon collision with the player. |
It can be destroyed with [[Weapons#Explosive Weapons|explosives]] or any weapon that destroys walls, and also by walking into it with the Hammerhead [[Mutations|mutation]]. |
It can be destroyed with [[Weapons#Explosive Weapons|explosives]] or any weapon that destroys walls, and also by walking into it with the Hammerhead [[Mutations|mutation]]. |
||
| Line 353: | Line 350: | ||
! style="text-align: center;" |[[File:Cocoon_idle.gif|centre]]Cocoon |
! style="text-align: center;" |[[File:Cocoon_idle.gif|centre]]Cocoon |
||
| style="text-align:center;" |Misc. |
| style="text-align:center;" |Misc. |
||
| − | |A cocoon found in the [[Crystal Caves]]. When destroyed, the cocoon has a chance to spawn a [[Pickups and Props#Chests|pickup]] |
+ | |A cocoon found in the [[Crystal Caves]]. When destroyed, the cocoon has a chance to spawn a [[Pickups and Props#Chests|pickup]] or an [[Alligator]]. |
| style="text-align: center;" |HP: 8 |
| style="text-align: center;" |HP: 8 |
||
|- |
|- |
||
| Line 380: | Line 377: | ||
! style="text-align: center;" |[[File:Car_idle.gif|centre]]Frozen Car Wreck |
! style="text-align: center;" |[[File:Car_idle.gif|centre]]Frozen Car Wreck |
||
| style="text-align:center;" |Explosive |
| style="text-align:center;" |Explosive |
||
| − | |Can be found in the [[Frozen City]] area. The car explodes when destroyed and is also used as a ranged weapon |
+ | |Can be found in the [[Frozen City]] area. The car explodes when destroyed and is also used as a ranged weapon by the [[Snowbot]]. Be careful, as it can be thrown very fast and has a large explosion radius. |
| style="text-align: center;" |HP: 20 |
| style="text-align: center;" |HP: 20 |
||
|- |
|- |
||
! style="text-align: center;" |[[File:Snowman_idle.gif|centre]]Snowman |
! style="text-align: center;" |[[File:Snowman_idle.gif|centre]]Snowman |
||
| style="text-align:center;" |Misc. |
| style="text-align:center;" |Misc. |
||
| − | |A snowman that can rarely be found in the [[Frozen City]]. When destroyed it spawns 3 [[Snow Bandit]]s and 6 [[Pickups and Props#Radiation|Rads]]. It seems to be built from Bandits rifles and rads, which would explain its contents. |
+ | |A snowman that can rarely be found in the [[Frozen City]]. When destroyed, it spawns 3 [[Snow Bandit]]s and 6 [[Pickups and Props#Radiation|Rads]]. It seems to be built from Bandits, rifles, and rads, which would explain its contents. |
| style="text-align: center;" |HP: 20 |
| style="text-align: center;" |HP: 20 |
||
|- |
|- |
||
| Line 402: | Line 399: | ||
<div class="mw-collapsible-content"> |
<div class="mw-collapsible-content"> |
||
| − | If you have [[Mutations# |
+ | If you have [[Mutations#Last Wish|Last Wish]] as one of your [[Mutations#Mutations table|mutations]] before [[Frozen City]], this prop will appear near your character's spawn area in 5-1. If you feed the flower by pressing "E" four times when near it, which will deal four damage to your character, it opens a portal to the [[Jungle]] secret area. |
</div> |
</div> |
||
</div> |
</div> |
||
| Line 436: | Line 433: | ||
It has more HP than most props. |
It has more HP than most props. |
||
| − | Prior to update #92, the Nuclear Pillars looked like [[Removed/Changed Content# |
+ | Prior to update #92, the Nuclear Pillars looked like [[Removed/Changed Content#Props 2|this]]. |
| style="text-align: center;" |HP: 70 |
| style="text-align: center;" |HP: 70 |
||
|- |
|- |
||
| Line 444: | Line 441: | ||
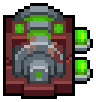
A Small Generator providing energy to [[the Palace]]. It creates a green explosion and drops 5 [[Pickups and Props#Radiation|rads]] when destroyed. The explosion deals <span style="color:#47CF17">12-24</span> damage. |
A Small Generator providing energy to [[the Palace]]. It creates a green explosion and drops 5 [[Pickups and Props#Radiation|rads]] when destroyed. The explosion deals <span style="color:#47CF17">12-24</span> damage. |
||
| − | Prior to update #92, the Small Generators looked like [[Removed/Changed Content# |
+ | Prior to update #92, the Small Generators looked like [[Removed/Changed Content#Props 2|this]]. They didn't explode and didn't drop rads. |
| style="text-align: center;" |HP: 40 |
| style="text-align: center;" |HP: 40 |
||
|- |
|- |
||
| Line 468: | Line 465: | ||
| style="text-align: center;" |Misc. |
| style="text-align: center;" |Misc. |
||
| |
| |
||
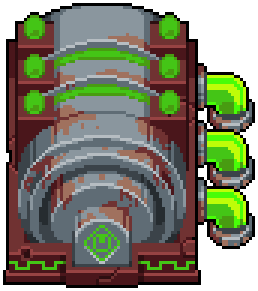
| − | These generators appear only on level 7-3 of the [[The Palace|Palace]]. There |
+ | These generators appear only on level 7-3 of the [[The Palace|Palace]]. There are 4 generators near the top of the room, 2 on each side. They can be damaged only after [[the Palace]] area boss fight starts. Each generator creates multiple green explosions when destroyed and can drop up to 2 [[Pickups and Props#Ammo Chests|ammo]]/[[Pickups and Props#Medkits|health]] pickups and 20 [[Pickups and Props#Radiation|rads]]. Each green explosion deals <span style="color:#47CF17">12-24</span> damage. |
HP of each Large Generator changes to 50 on [[Other Game Features#Looping|loops]]. |
HP of each Large Generator changes to 50 on [[Other Game Features#Looping|loops]]. |
||
| Line 476: | Line 473: | ||
<div class="mw-collapsible-content"> |
<div class="mw-collapsible-content"> |
||
| − | Destroying all 4 generators removes half of the |
+ | Destroying all 4 generators removes half of the [[The Nuclear Throne|Nuclear Throne]]'s remaining HP and guarantees that a [[Pickups and Props#Special Props|Loop Portal]] opens after the fight. Your [[Characters|character]] has to stay close to the Throne so it doesn't walk past them. Destroying all Large Generators on a [[Other Game Features#Looping|loop]] doesn't affect the Throne's HP. |
</div> |
</div> |
||
</div> |
</div> |
||
| Line 498: | Line 495: | ||
| style="text-align: center;" |Misc. |
| style="text-align: center;" |Misc. |
||
| |
| |
||
| − | When you kill the last [[Enemies|enemy]] on the map, this portal appears on its corpse. It takes you to the next [[Areas|stage]] of the game. It also appears when you open a passage to a secret area. Doing that kills most enemies on the map, which can be used to your advantage. As the Portal opens any remaining projectiles are destroyed and all [[Fire Trap]]s disabled. |
+ | When you kill the last [[Enemies|enemy]] on the map, this portal appears on its corpse. It takes you to the next [[Areas|stage]] of the game. It also appears when you open a passage to a secret area. Doing that kills most enemies on the map, which can be used to your advantage. As the Portal opens, any remaining projectiles are destroyed and all [[Fire Trap]]s are disabled. |
| − | The Portal can't be damaged and pulls your [[Characters|character]] in from a short distance, so be careful when you kill the last enemy. Portals don't pull as strong when you're further away from them and the first second after spawning. It's possible to resist the portal's pulling force by moving in the opposite direction. It becomes inescapably strong when near its center. After entering it the background where you |
+ | The Portal can't be damaged and pulls your [[Characters|character]] in from a short distance, so be careful when you kill the last enemy. Portals don't pull as strong when you're further away from them and the first second after spawning. It's possible to resist the portal's pulling force by moving in the opposite direction. It becomes inescapably strong when near its center. After entering it, the background where you choose your [[Mutations|mutations]] and the loading screen will show your character flying through a purple rotating spiral. |
When being pulled in, your character is immune to all damage except explosions. The Portal will destroy walls and any [[Pickups and Props#Destructible Objects|Destructible Object]] that's near it. This can cause Car Wrecks or Barrels to explode, which will damage you and can be lethal. Your character is immune to all damage when inside the Portal's sprite. |
When being pulled in, your character is immune to all damage except explosions. The Portal will destroy walls and any [[Pickups and Props#Destructible Objects|Destructible Object]] that's near it. This can cause Car Wrecks or Barrels to explode, which will damage you and can be lethal. Your character is immune to all damage when inside the Portal's sprite. |
||
| − | If the Portal appears near a stationary Pickup it will open it: |
+ | If the Portal appears near a stationary Pickup, it will open it: |
*If it's a [[Pickups and Props#Weapon Chests|Weapon Chest]], the [[Weapons|weapon]] will be sucked inside the Portal and taken with you to the next stage. |
*If it's a [[Pickups and Props#Weapon Chests|Weapon Chest]], the [[Weapons|weapon]] will be sucked inside the Portal and taken with you to the next stage. |
||
| − | *If it's any variation of an [[Pickups and Props#Ammo Chests|Ammo Chest]] the Mini Ammo Chest pickups inside will be pulled towards your character. This will for example cause Present Chests to give you ammo for your currently equipped weapons. |
+ | *If it's any variation of an [[Pickups and Props#Ammo Chests|Ammo Chest]], the Mini Ammo Chest pickups inside will be pulled towards your character. This will, for example, cause Present Chests to give you ammo for your currently equipped weapons. |
*If it's a [[Pickups and Props#Medkits|Medkit]], Mini Medkit pickups will come out of it and will be pulled towards your character. |
*If it's a [[Pickups and Props#Medkits|Medkit]], Mini Medkit pickups will come out of it and will be pulled towards your character. |
||
*[[Pickups and Props#Radiation|Radiation Canisters]] will break and all the Rads from them will be pulled towards your character. |
*[[Pickups and Props#Radiation|Radiation Canisters]] will break and all the Rads from them will be pulled towards your character. |
||
| − | *Any Mini Ammo Chests, Mini Medkits or Radiation left on the map will also get pulled towards your character when the Portal opens. Any weapon that's near it will get sucked inside and taken with you to the next stage. |
+ | *Any Mini Ammo Chests, Mini Medkits, or Radiation left on the map will also get pulled towards your character when the Portal opens. Any weapon that's near it will get sucked inside and taken with you to the next stage. |
| style="text-align: center;" | - |
| style="text-align: center;" | - |
||
|- |
|- |
||
| Line 544: | Line 541: | ||
Proto Statues are always surrounded by a few [[Bandit]]s. In the [[Frozen City]], they are replaced with [[Snow Bandit]]s. |
Proto Statues are always surrounded by a few [[Bandit]]s. In the [[Frozen City]], they are replaced with [[Snow Bandit]]s. |
||
| − | The statues can't be damaged by [[Enemies|enemies |
+ | The statues can't be damaged by [[Enemies|enemies]]. |
Each [[Other Game Features#Looping|loop]] increases HP of the statues by 10%. |
Each [[Other Game Features#Looping|loop]] increases HP of the statues by 10%. |
||
| Line 558: | Line 555: | ||
Appears when you destroy a charged Proto Statue. Entering it takes you to the [[Crown Vault]]. |
Appears when you destroy a charged Proto Statue. Entering it takes you to the [[Crown Vault]]. |
||
| − | Just like the purple version it can't be damaged and has the same attract power on your [[Characters|character]] when you're near it. It also makes you invulnerable to all damage when inside the Portal's sprite, but when being pulled in your character can be damaged by explosions. After entering it the background where you |
+ | Just like the purple version, it can't be damaged and has the same attract power on your [[Characters|character]] when you're near it. It also makes you invulnerable to all damage when inside the Portal's sprite, but when being pulled in, your character can be damaged by explosions. After entering it, the background where you choose your [[Mutations|mutations]] and the loading screen will be green and have a slower rotation. |
| − | Opening it won't kill any [[Enemies|enemies]] on the map, won't disable [[Fire Trap] |
+ | Opening it won't kill any [[Enemies|enemies]] on the map, won't disable [[Fire Trap], s and won't destroy remaining projectiles. It interacts with Pickups and Props the same way as the purple version. Any [[Pickups and Props#Ammo Chests|Mini Ammo Chests]], [[Pickups and Props#Medkits|Mini Medkits]], or [[Pickups and Props#Radiation|Radiation]] left on the map will also get pulled towards your character when the Portal opens. Any [[Weapons|weapon]] that's near it will get sucked inside and taken with you to the next stage. |
| style="text-align: center;" | - |
| style="text-align: center;" | - |
||
|- |
|- |
||
| Line 569: | Line 566: | ||
Spawns in [[I.D.P.D.]] units. |
Spawns in [[I.D.P.D.]] units. |
||
| − | I.D.P.D. Portals only spawn [[Grunt]]s by default. After enough I.D.P.D. Portals open during a run [[Inspector]]s and eventually [[Shielder]]s will have a chance of spawning. So the more of these portals appear throughout the run, the tougher units can spawn. Details on when these portals appear can be found on the [[I.D.P.D.]] page. |
+ | I.D.P.D. Portals only spawn [[Grunt]]s by default. After enough I.D.P.D. Portals open during a run, [[Inspector]]s and eventually [[Shielder]]s will have a chance of spawning. So the more of these portals appear throughout the run, the tougher units can spawn. Details on when these portals appear can be found on the [[I.D.P.D.]] page. |
The player can't interact with it. It has no attraction power on the player or any other objects in the game. It will destroy nearby walls. |
The player can't interact with it. It has no attraction power on the player or any other objects in the game. It will destroy nearby walls. |
||
| Line 598: | Line 595: | ||
Holds the [[Crowns|Crown]]. Touching the Pedestal will let you pick one of six Crowns and take you to the next level. If you enter the Vault a second or third time, touching the Pedestal will activate the Vault Statues. |
Holds the [[Crowns|Crown]]. Touching the Pedestal will let you pick one of six Crowns and take you to the next level. If you enter the Vault a second or third time, touching the Pedestal will activate the Vault Statues. |
||
| − | Destroying the Vault Statues before touching the Pedestal will make the Crown disappear. This will prevent you from choosing a new Crown or |
+ | Destroying the Vault Statues before touching the Pedestal will make the Crown disappear. This will prevent you from choosing a new Crown or returning the current one in this [[Crown Vault]]. |
Touching the Pedestal also removes the curse from [[Weapons#Cursed Weapons|Cursed Weapons]]. |
Touching the Pedestal also removes the curse from [[Weapons#Cursed Weapons|Cursed Weapons]]. |
||
| Line 612: | Line 609: | ||
Touching the Crown Pedestal will activate the statues. Each statue spawns a [[Crown Guardian]] which you have to kill before leaving the vault. |
Touching the Crown Pedestal will activate the statues. Each statue spawns a [[Crown Guardian]] which you have to kill before leaving the vault. |
||
| − | Destroying the statue also spawns a Crown Guardian, activates the other statues and the Crown Pedestal closes, which prevents you from getting a crown or |
+ | Destroying the statue also spawns a Crown Guardian, activates the other statues, and the Crown Pedestal closes, which prevents you from getting a crown or returning the current one. |
| style="text-align: center;" | HP: 20 |
| style="text-align: center;" | HP: 20 |
||
|} |
|} |
||
| Line 704: | Line 701: | ||
! style="text-align: center;" |[[File:Large_Cursed_Chest.png|centre]]Large Cursed Weapon Chest |
! style="text-align: center;" |[[File:Large_Cursed_Chest.png|centre]]Large Cursed Weapon Chest |
||
| style="text-align: center;" | Pickup |
| style="text-align: center;" | Pickup |
||
| − | | This chest appears only in [[Cursed Crystal Caves]] and contains 3 [[Weapons#Cursed Weapons|Cursed Weapons]]. Cursed Weapons can't be dropped unless you meet certain conditions listed on the [[Weapons|Weapons page]]. |
+ | | This chest appears only in [[Cursed Crystal Caves]] and contains 3 [[Weapons#Cursed Weapons|Cursed Weapons]]. Cursed Weapons can't be dropped unless you meet certain conditions, listed on the [[Weapons|Weapons page]]. |
| − | Large Cursed Weapon Chests can drop weapons from 3 difficulties higher. If Cursed Crystal Caves are treated as 4-1 in terms of difficulty, this chest can drop [[Weapons|weapons]] that are found in regular [[Pickups and Props#Weapon Chests|Weapon Chests]] in 5-3. ( |
+ | Large Cursed Weapon Chests can drop weapons from 3 difficulties higher. If Cursed Crystal Caves are treated as 4-1 in terms of difficulty, this chest can drop [[Weapons|weapons]] that are found in regular [[Pickups and Props#Weapon Chests|Weapon Chests]] in 5-3. (Check the [[Weapons#Weapon Chest drops table|Weapon Chest drops table]].) |
Weapons that drop from regular Weapon Chests in area 1-1 can't be found in Large Cursed Chests. Any other weapon in the game can be cursed, including [[Weapons#Golden Weapons|golden]] and [[Weapons#Ultra Weapons|ultra weapons]]. |
Weapons that drop from regular Weapon Chests in area 1-1 can't be found in Large Cursed Chests. Any other weapon in the game can be cursed, including [[Weapons#Golden Weapons|golden]] and [[Weapons#Ultra Weapons|ultra weapons]]. |
||
| Line 742: | Line 739: | ||
| style="text-align: center;" |Explosive |
| style="text-align: center;" |Explosive |
||
| |
| |
||
| − | [[Y.V's Crib]] has a garage full of Golden Cars. They are already fixed versions |
+ | [[Y.V's Crib]] has a garage full of Golden Cars. They are already fixed versions of the Golden Car Wreck prop from 3-1. |
| − | There are two models of this prop, both have the same properties. They explode upon taking damage. Pressing "E" on top of one |
+ | There are two models of this prop, but both have the same properties. They explode upon taking damage. Pressing "E" on top of one will open a portal to [[Y.V's Mansion]]. Any Golden Car near the portal will explode, which won't hurt the player. Blowing up the cars will respawn them after a few seconds. |
| style="text-align: center;" |HP: 25 |
| style="text-align: center;" |HP: 25 |
||
|- |
|- |
||
| Line 758: | Line 755: | ||
<div class="mw-collapsible-content">[[File:Golden_TV.png|center]]</div></div>Giant Golden TV |
<div class="mw-collapsible-content">[[File:Golden_TV.png|center]]</div></div>Giant Golden TV |
||
| style="text-align: center;" |Prop |
| style="text-align: center;" |Prop |
||
| − | | A Giant TV that has a console and two big speakers plugged into it. Yung Cuz plays video games on the console and breaking the TV will make him cry. |
+ | | A Giant TV that has a console and two big speakers plugged into it. Yung Cuz plays video games on the console, and breaking the TV will make him cry. |
This prop has exactly 1000 HP and is currently the biggest prop in the game. |
This prop has exactly 1000 HP and is currently the biggest prop in the game. |
||
Latest revision as of 15:44, 10 December 2023
This page includes items you may find during gameplay which will help you progress and environmental hazards randomly placed on the map.
Pickup Details[]
Pickup drop rate is different per enemy. There's a modifier for the drop rate that changes depending on your ammo percentages. The modifier works per weapon, the values for the primary and secondary weapons are added together. In short, low ammo will get you more pickups. In detail, it works like this:
- The default ammo drop modifier is 50% for primary and secondary weapons (50% + 50% = 100%).
- If your weapon's ammo is under 20% max ammo, the modifier for that weapon becomes 80%.
- If the ammo is over 60% max ammo, the modifier for that weapon becomes 15%.
- Melee weapons that require no ammo are always 15%.
For example:
- Low ammo Laser Rifle, and a Sledgehammer? 80% + 15% = 95% normal amount of drops.
- Two bullet Weapons and near max bullets? 15% + 15% = 30% normal amount of drops.
- A low and a high ammo weapon? 80% + 15% = 95% of the normal drops, forcing you to use the high ammo weapon, instead of just getting drops for the one that's low.
As you can see, this system is mainly there to reduce ammo when it is too high, not there to help too much when ammo is low, as it ranges from 30% to 160% (15% + 15% to 80% + 80%).
The Rabbit Paw mutation adds 40% to the total modifier.
Crown of Risk adds 50% to the total modifier when at full HP, but subtracts 50% when at less than full HP.
Drops being HP instead of ammo depends on your total health. The lower it is, the bigger the chance of a Mini Ammo Chest turning into a Mini Medkit, basically going from 0% to 66% as your health nears 0. It also means that you get more health drops when low on ammo. You calculate the chance (in percentage) of a Mini Ammo Chest turning into a Mini Medkit using the following formula: (66/Max HP) * (Max HP - HP) or 66 * (Missing Health%)
Fade time depends on the pickup type and how many times you looped the game. Rads fade away after 5-6 seconds. Ammo, health, and Portal Strike mini pickups fade away after 6.7-7.7 seconds. The further you loop, the faster they fade, following the formula:
- For rads, it's ((from 5 to 6 seconds)*4)/(4+ number of loops)
- For ammo, health and Portal Strike mini pickups it's ((from 6.7 to 7.7 seconds)*5)/(5+ number of loops)
- For Cursed Ammo Chests it's (((from 6.7 to 7.7 seconds)*5)/(5+ number of loops))/3
Chests[]
Stationary Chests are found on every level and zone and can be opened by walking over them or by a portal appearing nearby. Mini Chests are dropped by enemies as pickups and fade after few seconds.
Ammo Chests[]
| Chest | Description |
|---|---|
Mini Ammo Chest |
Dropped by enemies. Gives ammo for either your primary or secondary weapon (50/50 chance). Having full ammo or a melee weapon will give you ammo for a random type. Someone with a Sledgehammer and a Slugger picking up a mini chest will have a 60% chance to get shells because of the slugger, and a 40% chance to get a different ammo type. It gives 32 bullets, 8 shells, 7 bolts, 6 explosives, or 10 energy. |
|
Ammo Chest |
These chests give you twice the ammo contained in Mini Ammo Chests. Gives ammo for your current primary weapon. Having full ammo for that weapon or holding a melee weapon causes it to give a random ammo type. It contains 2 Mini Ammo Chests inside, which grants 64 bullets, 16 shells, 14 bolts, 12 explosives, or 20 energy. |
Present Ammo Chest |
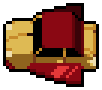
There's a 1/4 chance that an Ammo Chest becomes a Present Ammo Chest. It can appear in each area besides 7-3. It will give you a generous amount of ammo for weapons that you don't have equipped. It contains 3 Mini Ammo Chests; that's 96 bullets, 24 shells, 21 bolts, 18 explosives, or 30 energy. If a portal spawns and opens the Present Chest, it'll give you 2 Mini Ammo Chests instead, but with ammo for your currently equipped weapons. |
I.D.P.D. Ammo Chest |
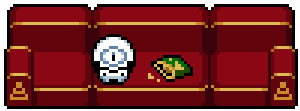
There's a 1/15 chance that an Ammo Chest becomes an I.D.P.D. Ammo Chest. It can appear in each area after Scrapyard, besides 7-3. Unlike other ammo chests, opening this one drops 5 Mini Ammo Chests on top of your character. This means they behave the same as ammo pickups dropped by enemies, giving ammo for either your primary or secondary weapon (50/50 chance). Having full ammo or a melee weapon will give you ammo for a random type. Opening the chest spawns a bunch of I.D.P.D. troops. If a level ending portal spawns and opens the chest, it'll also give you 5 Mini Ammo Chests and you can leave the I.D.P.D. behind. |
Cursed Mini Ammo Chest |
If you are carrying two Cursed Weapons, enemies have a 50% chance to drop this pickup instead of a regular Mini Ammo Chest. It emits purple smoke. Contains 1.5 times the ammo of a Mini Ammo Chest. It gives 48 bullets, 12 shells, 10 bolts, 9 explosives, or 15 energy. They fade 3 times faster than regular Mini Ammo Chests, and instead of just disappearing, Cursed Mini Ammo Chests will explode, creating 3 closely packed small explosions that deal 5-10 damage each. They are not affected by the Plutonium Hunger mutation and are not pulled toward the player when the end-of-level portal opens. |
Weapon Chests[]
| Chest | Description |
|---|---|
Weapon Chest |
Contains a weapon and some ammo (2 Mini Ammo Chest pickups). The further you are in the run, the greater the chance for a more advanced weapon (check the Weapon Chest drops table). Robot will find more advanced weapons earlier than other characters. |
 Large Weapon Chest |
Contains 3 weapons and a large amount of ammo for those weapons (2 Mini Ammo Chest pickups for each weapon). If you leave a regular Weapon Chest unopened, there's a 25% chance for a Large Weapon Chest to replace a regular Weapon Chest on the next level. The chance adds up for every skipped Weapon Chest, so not opening 4 Weapon Chests in a row guarantees that the 5th one will be a Large Weapon Chest. It cannot spawn at 7-3, however. The spawn chance doesn't reset if you open a regular Weapon Chest after leaving one unopened. Skipping a Large Weapons Chest adds the same 25% chance as skipping a regular one. Only opening the Large Weapon Chest resets the spawn chance back to 0%. A viable strategy is to aim for a Large Weapons Chest on later stages of the game, where more powerful weapons can drop from it (check the Weapon Chest drops table). |
Cursed Weapon Chest |
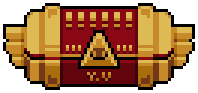
If you have a Crown, there's a 1/7 chance that a regular Weapon Chest turns into a Cursed Chest. Large Weapon Chests can't become cursed and will spawn in place of a Cursed Chest. Contains a Cursed Weapon. Cursed Weapons can't be dropped unless you meet certain conditions listed on the Weapons page. Cursed Chests can contain weapons from 2 difficulties higher, which means a weapon that normally drops from a Weapon Chest in 5-3 can be inside a Cursed Chest in 5-1 (check the Weapon Chest drops table). Weapons that drop from regular Weapon Chests in area 1-1 can't be found in Cursed Chests. Any other weapon in the game can be cursed, including golden and ultra weapons. |
Proto Weapon Chest |
Found in the Crown Vault if you already have a Crown when entering it. The Proto Chest contains a Rusty Revolver and can act as a storage for the weapon you swap with the Rusty Revolver. If you leave a weapon inside, it will be there when you find the Proto Chest again, even with a different character, in a different playthrough. It can also be used for storing character-exclusive weapons like the Golden Revolver, Chicken Sword, Black Sword, or the Guitar, otherwise obtainable by other characters only in co-op mode. If, however, you instead leave it without a weapon inside of it, the next time it is opened, it will contain a Rusty Revolver. Weapons stored inside also carry over to other game modes. The chest will have the same weapon if you play on Normal Mode, Hard Mode, or Co-op. However, it will not transfer over weapons from a Daily or Weekly Run. The Proto Chest will contain a Rusty Revolver during Daily and Weekly Runs. Since the Proto Chest is classified as a Chest, the Crown of Hatred can be used to gain rads from the chest infinitely by opening and closing it again so long as you have the hp to do so. This can also be paired with the Crown Guardian and its attack, which can be used to farm for the infinite hp necessary to utilize this exploit to the fullest extent. |
Medkits[]
Medkits are only spawned/dropped while your character is damaged.
| Medkit | Description |
|---|---|
Mini Medkit |
Dropped by enemies. Restores 2 HP. The lower your HP is, the bigger the chance that a Mini Ammo Chest turns into a Mini Medkit, basically going from 0% to 66% as your health nears 0. |
Medkit |
If your health is under 50% at the beginning of a level, there's a 50% chance that the Radiation Canister turns into a stationary Medkit. Contains 2 Mini Medkits inside. Restores 4 HP. Walking over a Medkit while playing as Chicken will also recover one lost max HP. |
Radiation[]
Radiation is the experience of Nuclear Throne. When you collect a certain amount, you will level up. As you enter a portal you will be able to choose a mutation. To level up, you need to get 60 rads multiplied by your current level number, which means the number of Rads required increases with the level of the character (60, 120, 180, etc.). The game allows players to reach level 9, which means a total of 8 mutations (or 9 mutations if you take the Crown of Destiny, 10 if you also picked Patience) + 1 more if you go over level 9 and pick an Ultra Mutation. Radiation is also used as ammo for Ultra Weapons and Horror's active.
| Radiation | Description | Hit Points |
|---|---|---|
Radiation (Rads) |
Dropped by almost every enemy in the game, this is the main source of experience. | - |
Radiation Chunk |
Dropped by stronger enemies like Bosses. Worth 10 rads. | - |
|
Radiation Canister |
Drops 25 Rads when walked on or damaged. | HP: 4 |
 Overgrown Radiation Canister |
Some radiation canisters found on the Desert area are contaminated and will spew out 20 Radiation Maggots that drop more radiation than ordinary maggots. It has a higher chance of spawning when the Canister is located on darker muddy sand in the desert. The canister gives 40 Rads if you manage to kill all the maggots. Radiation Maggots have 2 HP each and die upon contact with your character. It is possible to kill them all at once by just walking over the canister, but you will take 1 damage. |
HP: 8 |
 Big Radiation Canister |
Drops 45 Rads (25 small Rads and 2 Chunks) when walked on or damaged.
If you missed a regular Radiation Canister on the previous level, it is guaranteed that this one will spawn on the next level. |
HP: 20 |
|
Portal Strike Ammo Canister |
It contains one Portal Strike Ammo Crate. Replaces the Radiation Canisters if you're playing as Rogue. Walking over it gives one ammo for her active ability. The canister can't be damaged, but it's affected by the level ending portals. If you are playing co-op and someone other than Rogue touches it, it will explode. | - |
|
Each crate gives one Portal Strike ammo if you're playing as Rogue. It's only seen when a level ending portal spawns next to a Portal Strike Ammo Canister. |
- |
Destructible Objects[]
A list of all Destructible Objects found in the game, ordered by the area of their first appearance.
| Object | Type | Description | Hit Points |
|---|---|---|---|
Character Selection Screen | |||
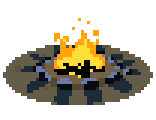 |
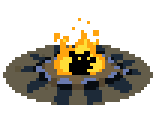
Prop | A campfire that keeps the mutants warm. It has exactly 1,000,000 HP.
 If you get the campfire with said logo and wait for the main menu music to finish, you'll hear a secret track that only plays in these conditions. This secret track is a variation of the pause music that Vlambeer used in their previous games. |
HP: 1 million |
  
Night Cactus |
Prop | A simple cactus found in the Character Selection Screen. | HP: 2 |
 |
Prop | A simple pile of bones sometimes found in the Character Selection Screen. | HP: 2 |
 |
Prop |
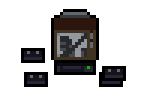
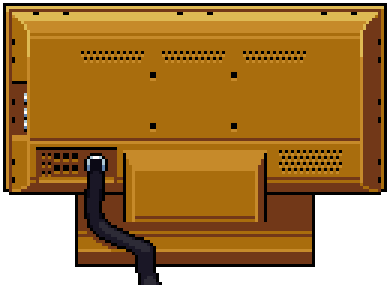
Appears in front of Chicken on the selection screen. She watches the following movies on it: In rare cases, instead of a movie, the TV will display the mascot of YellowAfterlife, a notable programmer of the game. |
HP: 1 |
Desert | |||
  
Cactus |
Prop | A simple cactus found in the Desert area. | HP: 2 |
  
Rotting Cactus |
Prop | A rotting cactus found in the Desert area. | HP: 2 |
 |
Prop | A simple pile of bones sometimes found in the Desert. Often on tainted, muddy sand. | HP: 2 |
 |
Prop |
A mysterious skull sometimes found in the Desert. Prior to update #47, the Skulls looked like this. |
HP: 50 |
 |
Explosive | These can be commonly found in the Desert area, usually with bandits hanging around them. Shooting or hitting a barrel will cause it to explode. It only takes one hit from any weapon to detonate. The explosion deals 5-10 damage. | HP: 1 |
Sewers | |||
 |
Prop | A pipe object found in the Sewers. Instantly destructible. | HP: 1 |
 |
Explosive |
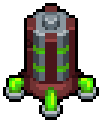
Causes a big explosion when damaged, just like the regular Explosive Barrel, but it also releases toxic gas clouds. Each cloud deals 3 damage when walking through and disappears over time. |
HP: 1 |
Scrapyard | |||
 |
Prop | A neatly stacked stack of tires found in the Scrapyard. | HP: 6 |
 |
Explosive |
Can be found in the Scrapyard area. Similar to the Explosive Barrel, but takes more damage to explode. Very big explosion radius. Will explode if the portal spawns on or near it. If your character is being pulled by the portal, the explosion can still damage you. It will do no damage if your character is inside the portal's sprite. |
HP: 20 |
 |
Explosive |
A suspicious wreck found on area 3-1. Explodes like a regular Car Wreck when destroyed, but has higher durability and a bigger explosion. Can explode upon portal spawns as the regular Car Wrecks would.
If you bring a Screwdriver to 3-1 and hit this car, then press "E" on top of it, it will take you to the Y.V's Mansion secret area. The wreck can also be fixed with a Golden Screwdriver or Energy Screwdriver. The fixed Golden Car's radio will play music if you don't enter it immediately. |
HP: 25 |
 |
Trap | A stationary turret that sprays fire horizontally and vertically. Only appears in the Scrapyard levels.
The fire does 1 damage per hit animation. It doesn't damage enemies, only the player, but enemies will block the flames. The Boiling Veins mutation prevents damage from Fire Traps when under 4 health. However, it will still make the burning sound effect upon collision with the player. It can be destroyed with explosives or any weapon that destroys walls, and also by walking into it with the Hammerhead mutation. |
- |
Crystal Caves | |||
 |
Prop | Found in the Crystal Caves. Emits light. | HP: 2 |
 |
Misc. | A cocoon found in the Crystal Caves. When destroyed, the cocoon has a chance to spawn a pickup or an Alligator. | HP: 8 |
Frozen City | |||
 |
Prop | An old lamp post found in the Frozen City. | HP: 5 |
 |
Prop | A frozen fire hydrant found in the Frozen City. | HP: 5 |
| Prop | A piece of ice shaped like an icicle found in the Frozen City. | HP: 6 | |
 |
Prop | A newspaper stand found in the Frozen City. | HP: 6 |
 |
Explosive | Can be found in the Frozen City area. The car explodes when destroyed and is also used as a ranged weapon by the Snowbot. Be careful, as it can be thrown very fast and has a large explosion radius. | HP: 20 |
 |
Misc. | A snowman that can rarely be found in the Frozen City. When destroyed, it spawns 3 Snow Bandits and 6 Rads. It seems to be built from Bandits, rifles, and rads, which would explain its contents. | HP: 20 |
 |
Misc. | A frozen soda machine rarely found in the Frozen City. Drops a lot of sodas when destroyed. These sodas don't do anything. You can see Y.V. saying "Pop Pop Pop" on the front. | HP: 24 |
 |
Misc. |
A suspicious flower sometimes found in area 5-1.
If you have Last Wish as one of your mutations before Frozen City, this prop will appear near your character's spawn area in 5-1. If you feed the flower by pressing "E" four times when near it, which will deal four damage to your character, it opens a portal to the Jungle secret area. |
HP: 500 |
Labs | |||
 |
Prop | Contained experiments that have broken out, most likely Freaks. | HP: 2 |
 |
Misc. | It will flood out 8 Freaks when destroyed. | HP: 2 |
 |
Prop | A server found in the Labs. Often spawns in groups in small server rooms. | HP: 10 |
 |
Prop | A terminal found in the Labs. Emits light. Often spawns near Server props. | HP: 10 |
The Palace | |||
 |
Prop | A radiation-filled pillar found in the Palace.
It has more HP than most props. Prior to update #92, the Nuclear Pillars looked like this. |
HP: 70 |
 |
Explosive |
A Small Generator providing energy to the Palace. It creates a green explosion and drops 5 rads when destroyed. The explosion deals 12-24 damage. Prior to update #92, the Small Generators looked like this. They didn't explode and didn't drop rads. |
HP: 40 |
 |
Misc. |
These floating statues appear only on level 7-3 of the Palace. There are 10 statues, 5 on each side of the room. They can't be damaged by the player.
As you fight the Nuclear Throne, it will break the statues with its large projectiles or by walking over them. Each broken statue spawns a Guardian enemy. |
- |
 Large Generator |
Misc. |
These generators appear only on level 7-3 of the Palace. There are 4 generators near the top of the room, 2 on each side. They can be damaged only after the Palace area boss fight starts. Each generator creates multiple green explosions when destroyed and can drop up to 2 ammo/health pickups and 20 rads. Each green explosion deals 12-24 damage. HP of each Large Generator changes to 50 on loops.
Destroying all 4 generators removes half of the Nuclear Throne's remaining HP and guarantees that a Loop Portal opens after the fight. Your character has to stay close to the Throne so it doesn't walk past them. Destroying all Large Generators on a loop doesn't affect the Throne's HP. |
HP: 230 after loop HP: 50 |
Special Props[]
Special Props can appear in multiple areas throughout the game.
| Object | Type | Description | Hit Points |
|---|---|---|---|
 |
Misc. |
When you kill the last enemy on the map, this portal appears on its corpse. It takes you to the next stage of the game. It also appears when you open a passage to a secret area. Doing that kills most enemies on the map, which can be used to your advantage. As the Portal opens, any remaining projectiles are destroyed and all Fire Traps are disabled. The Portal can't be damaged and pulls your character in from a short distance, so be careful when you kill the last enemy. Portals don't pull as strong when you're further away from them and the first second after spawning. It's possible to resist the portal's pulling force by moving in the opposite direction. It becomes inescapably strong when near its center. After entering it, the background where you choose your mutations and the loading screen will show your character flying through a purple rotating spiral. When being pulled in, your character is immune to all damage except explosions. The Portal will destroy walls and any Destructible Object that's near it. This can cause Car Wrecks or Barrels to explode, which will damage you and can be lethal. Your character is immune to all damage when inside the Portal's sprite. If the Portal appears near a stationary Pickup, it will open it:
|
- |
 |
Misc. |
Works the same as a regular portal but has an infinite pull range. It will pull you in from any point on the level unless you are behind a wall. Entering it then signifies that you looped the game.
The Loop Portal appears only if you destroy all 4 Large Generators during the Nuclear Throne boss fight and afterward defeat the Throne. |
- |
 |
Misc. |
The statue spawns in every other area on the second stage, starting with Scrapyard 3-2, and then Frozen City 5-2. It can also spawn in the Desert 1-2 and Palace 7-2 after looping. The statue opens when it's damaged down to 80 HP. Opening the statue causes I.D.P.D. to teleport in. When opened, this ancient statue collects radiation dropped around it, charging the statue. Charging it indicates how much more radiation it needs. When it is fully charged (24 rads), its remaining HP gets halved and a pulsating ball of energy appears in its center. Horror's Radiation Beam can also be used to charge the statue. Damaging the charged statue alerts the I.D.P.D. troops again. If you destroy the statue when it's fully charged, it will spawn a Proto Portal to the Crown Vault. If it is destroyed before that, it will drop the rads it collected. If you leave the level before it's destroyed, it will keep all the radiation inside. Proto Statues are always surrounded by a few Bandits. In the Frozen City, they are replaced with Snow Bandits. The statues can't be damaged by enemies. Each loop increases HP of the statues by 10%. All Proto Statues are destroyed during a Weekly Run. Prior to update #41, the statues looked like this. They did not need to be opened before charging and had less HP. |
HP: 120 |
 |
Misc. |
Appears when you destroy a charged Proto Statue. Entering it takes you to the Crown Vault. Just like the purple version, it can't be damaged and has the same attract power on your character when you're near it. It also makes you invulnerable to all damage when inside the Portal's sprite, but when being pulled in, your character can be damaged by explosions. After entering it, the background where you choose your mutations and the loading screen will be green and have a slower rotation. Opening it won't kill any enemies on the map, won't disable [[Fire Trap], s and won't destroy remaining projectiles. It interacts with Pickups and Props the same way as the purple version. Any Mini Ammo Chests, Mini Medkits, or Radiation left on the map will also get pulled towards your character when the Portal opens. Any weapon that's near it will get sucked inside and taken with you to the next stage. |
- |
 |
Misc. |
Spawns in I.D.P.D. units. I.D.P.D. Portals only spawn Grunts by default. After enough I.D.P.D. Portals open during a run, Inspectors and eventually Shielders will have a chance of spawning. So the more of these portals appear throughout the run, the tougher units can spawn. Details on when these portals appear can be found on the I.D.P.D. page. The player can't interact with it. It has no attraction power on the player or any other objects in the game. It will destroy nearby walls. |
- |
| Object | Type | Description | Hit Points |
|---|---|---|---|
Crown Vault | |||
 |
Prop |
Found in the Crown Vault. Emits light. The look of Torches was changed multiple times. |
HP: 8 |
 |
Misc. |
Holds the Crown. Touching the Pedestal will let you pick one of six Crowns and take you to the next level. If you enter the Vault a second or third time, touching the Pedestal will activate the Vault Statues. Destroying the Vault Statues before touching the Pedestal will make the Crown disappear. This will prevent you from choosing a new Crown or returning the current one in this Crown Vault. Touching the Pedestal also removes the curse from Cursed Weapons. Prior to update #93, the Pedestal looked like this. |
- |
 |
Misc. |
If you enter the Crown Vault with a crown equipped, the Crown Pedestal will be guarded by two floating Vault Statues. The third vault will have four Vault Statues. Touching the Crown Pedestal will activate the statues. Each statue spawns a Crown Guardian which you have to kill before leaving the vault. Destroying the statue also spawns a Crown Guardian, activates the other statues, and the Crown Pedestal closes, which prevents you from getting a crown or returning the current one. |
HP: 20 |
Secret Props
Secret Props appear only in Secret Areas.| Object | Type | Description | Hit Points |
|---|---|---|---|
Oasis | |||
 |
Prop | A simple underwater plant. | HP: 1 |
| Prop | An old and rusted barrel that probably contained some explosive chemicals before. Now it just rusts. | HP: 1 | |
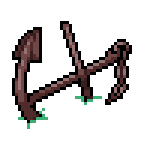 |
Prop | A giant anchor. | HP: 30 |
 |
Explosive | Shooting or hitting the Mine will cause a delayed explosion. The explosion is similar to the Explosive Barrel's, but the Mine also fires 10 projectiles that fan out in a circle. Each projectile deals 3 damage. | HP: 10 |
 |
Pickup | A big Clam found in the Oasis. Acts the same as a regular Weapon Chest. | - |
Pizza Sewers | |||
|
|
Pickup |
Dropped by enemies and Pizza Boxes in the Pizza Sewers. Acts like a Mini Medkit, restoring 2 HP. |
- |
 |
Prop |
Has a 20% chance to drop one Pizza Slice pickup when destroyed. "COWABUNGA!" |
HP: 4 |
Y.V's Mansion | |||
 |
Prop | Y.V's money that he left lying around on the floor. | HP: 1 |
 |
Prop | Y.V's ego materialized in the form of a statue. | HP: 15 |
 |
Explosive | A golden version of the common Explosive Barrel, with a stick of dynamite inside. Acts the same as a regular Explosive Barrel. | HP: 1 |
| Pickup | This chest appears only in Y.V's Mansion and always contains a Golden Weapon. | - | |
Cursed Crystal Caves | |||
 
Cursed Glowing Crystal |
Prop | A Glowing Crystal prop that can appear in two different colors, found in the Cursed Crystal Caves. Emits Light. | HP: 2 |
 |
Pickup | This chest appears only in Cursed Crystal Caves and contains 3 Cursed Weapons. Cursed Weapons can't be dropped unless you meet certain conditions, listed on the Weapons page.
Large Cursed Weapon Chests can drop weapons from 3 difficulties higher. If Cursed Crystal Caves are treated as 4-1 in terms of difficulty, this chest can drop weapons that are found in regular Weapon Chests in 5-3. (Check the Weapon Chest drops table.) Weapons that drop from regular Weapon Chests in area 1-1 can't be found in Large Cursed Chests. Any other weapon in the game can be cursed, including golden and ultra weapons. |
- |
Jungle | |||
|
Bush |
Prop |
A simple bush found in the Jungle. If the prop moves suspiciously and you can spot a red eye, it is a disguised Jungle Assassin. |
HP: 1 |
 |
Prop | An unfrozen version of the Frozen Corpse Flower prop from 5-1. | HP: 12 |

| Object | Type | Description | Hit Points |
|---|---|---|---|
Y.V's Crib | |||
Golden Car |
Explosive |
Y.V's Crib has a garage full of Golden Cars. They are already fixed versions of the Golden Car Wreck prop from 3-1. There are two models of this prop, but both have the same properties. They explode upon taking damage. Pressing "E" on top of one will open a portal to Y.V's Mansion. Any Golden Car near the portal will explode, which won't hurt the player. Blowing up the cars will respawn them after a few seconds. |
HP: 25 |
 |
Prop | An expensive couch which Y.V's cousin (Yung Cuz) sits on while eating triangular chips and playing video games on a console. He will pause the game if you stand too close. He will cheer whenever you press "B" to sound the air horn.
This prop is indestructible. |
- |
 |
Prop | A Giant TV that has a console and two big speakers plugged into it. Yung Cuz plays video games on the console, and breaking the TV will make him cry.
This prop has exactly 1000 HP and is currently the biggest prop in the game. |
HP: 1000 |
 |
Pickup | Y.V's Crib has two of these chests that hold 25 different weapons each. These chests can contain weapons from six difficulties higher. Opening both chests will give you tons of ammo for the weapons found inside. | - |
 |
Pickup | Y.V's Crib will have two of these chests instead if you have Crown of Love. Each chest contains 25 Mini Ammo Chests. | - |
| Object | Type | Description | Hit Points |
|---|---|---|---|
I.D.P.D. Headquarters | |||
 |
Prop | A nice looking plant in a white pot, decorating the hallways of the I.D.P.D. HQ. | HP: 1 |