(→Sewers) Tag: Visual edit |
|||
| (12 intermediate revisions by 9 users not shown) | |||
| Line 5: | Line 5: | ||
'''''HP of Bosses and other Enemies''' changes depending on loops/amount of players. Each loop increases the HP of all enemies by 5%. HP of Bosses first increases by 33%, then by 5%. Each additional player increases the HP of Bosses by 50%.'' |
'''''HP of Bosses and other Enemies''' changes depending on loops/amount of players. Each loop increases the HP of all enemies by 5%. HP of Bosses first increases by 33%, then by 5%. Each additional player increases the HP of Bosses by 50%.'' |
||
| − | ''The '''Drops on death''' column contains the guaranteed number of Rads ([[Pickups and Props#Radiation|Radiation]]) that each enemy drops when it dies. It also contains the max number of other things that can drop from each enemy. Most enemies have a chance to drop a Pickup ([[Pickups and Props#Ammo Chests|Mini Ammo Chest]] or [[Pickups and Props#Medkits|Mini Medkit]]), some can drop two at once. There are also a few enemies that can rarely drop a [[Weapons|weapon]]. However taking the [[Crowns#Crown of Guns|Crown of Guns]] gives all enemies |
+ | ''The '''Drops on death''' column contains the guaranteed number of Rads ([[Pickups and Props#Radiation|Radiation]]) that each enemy drops when it dies. It also contains the max number of other things that can drop from each enemy. Most enemies have a chance to drop a Pickup ([[Pickups and Props#Ammo Chests|Mini Ammo Chest]] or [[Pickups and Props#Medkits|Mini Medkit]]), some can drop two at once. There are also a few enemies that can rarely drop a [[Weapons|weapon]]. However taking the [[Crowns#Crown of Guns|Crown of Guns]] gives all enemies at least an 8% chance to drop a weapon.'' |
==[[Areas#Progression Areas|Progression Areas]]== |
==[[Areas#Progression Areas|Progression Areas]]== |
||
===[[Desert]]=== |
===[[Desert]]=== |
||
| Line 199: | Line 199: | ||
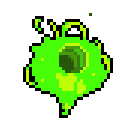
*Loves toxic gas, heals itself with it. |
*Loves toxic gas, heals itself with it. |
||
*Explodes into 20 green projectiles and releases a toxic cloud, when killed or when it comes into contact with the player. |
*Explodes into 20 green projectiles and releases a toxic cloud, when killed or when it comes into contact with the player. |
||
| − | *Unlike the regular Ballguy, it breaks walls near it's |
+ | *Unlike the regular Ballguy, it breaks walls near it's location of death. |
| |
| |
||
| Line 382: | Line 382: | ||
![[File:Lightning_Crystal_idle.gif|link=http://nuclear-throne.wikia.com/wiki/Lightning_Crystal|centre]]<p style="text-align: center;">[[Lightning Crystal]]</p> |
![[File:Lightning_Crystal_idle.gif|link=http://nuclear-throne.wikia.com/wiki/Lightning_Crystal|centre]]<p style="text-align: center;">[[Lightning Crystal]]</p> |
||
| |
| |
||
| − | *Spawns only |
+ | *Spawns only after [[Other_Game_Features#Looping|looping]]. |
*Constantly emits red lightning. |
*Constantly emits red lightning. |
||
*Turns red when charging. |
*Turns red when charging. |
||
| Line 476: | Line 476: | ||
* Unlike the regular [[Snow Tank]], the Golden Snow Tank will immediately attack the player if they get too close. |
* Unlike the regular [[Snow Tank]], the Golden Snow Tank will immediately attack the player if they get too close. |
||
* Reduced lock-on duration. Shoots faster but shorter bursts. |
* Reduced lock-on duration. Shoots faster but shorter bursts. |
||
| − | * Shoots two streams of red projectiles in one of 2 V-patterns, the first going in-to-out the second going out-to-in, it rarely does the second |
+ | * Shoots two streams of red projectiles in one of 2 V-patterns, the first going in-to-out the second going out-to-in, it rarely does the second pattern. |
* Fires a golden rocket between the projectile trails. |
* Fires a golden rocket between the projectile trails. |
||
*Explodes on death after a short delay, creating two big explosions and four small explosions. |
*Explodes on death after a short delay, creating two big explosions and four small explosions. |
||
| Line 566: | Line 566: | ||
*Has the ability to revive fallen [[Freak]]s. |
*Has the ability to revive fallen [[Freak]]s. |
||
*Can also turn other enemy corpses and [[Pickups and Props#Destructible Objects|destroyed objects]] into living [[Freak]]s. |
*Can also turn other enemy corpses and [[Pickups and Props#Destructible Objects|destroyed objects]] into living [[Freak]]s. |
||
| − | | style="text-align: center;" | |
+ | | style="text-align: center;" |None |
| style="text-align: center;" |HP: 6 |
| style="text-align: center;" |HP: 6 |
||
| style="text-align: center;" | |
| style="text-align: center;" | |
||
| Line 655: | Line 655: | ||
| |
| |
||
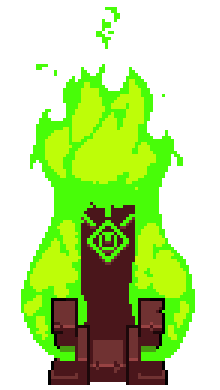
*Final Boss of the game. |
*Final Boss of the game. |
||
| − | *Shoots a large green laser |
+ | *Shoots a large green laser once activated, it kills instantly upon contact. |
* Fires 2 tri-shot bursts green bullets. |
* Fires 2 tri-shot bursts green bullets. |
||
* Shoots two large green orbs that explode into smaller green orbs in a star pattern. Large orbs can break [[Pickups and Props#The Palace|Throne Statues]] which spawn [[Guardian]]s. |
* Shoots two large green orbs that explode into smaller green orbs in a star pattern. Large orbs can break [[Pickups and Props#The Palace|Throne Statues]] which spawn [[Guardian]]s. |
||
| Line 714: | Line 714: | ||
*Teleports. |
*Teleports. |
||
*Destroys walls on death. |
*Destroys walls on death. |
||
| − | * |
+ | *Doesn't cause melee damage. |
| style="text-align: center;" | |
| style="text-align: center;" | |
||
Orb: 5 Damage |
Orb: 5 Damage |
||
| Line 852: | Line 852: | ||
| |
| |
||
<p style="text-align: center;">Projectile: 3 Damage</p> |
<p style="text-align: center;">Projectile: 3 Damage</p> |
||
| − | <p style="text-align: center;">Missile: 4 Damage on |
+ | <p style="text-align: center;">Missile: 4 Damage on contact + [[Enemies#Damage_explanation|Explosive Damage]]</p> |
| style="text-align: center;" |1st loop HP: 42 |
| style="text-align: center;" |1st loop HP: 42 |
||
| style="text-align: center;" | |
| style="text-align: center;" | |
||
| Line 890: | Line 890: | ||
*Can spawn through [[Pickups and Props#Special Props|blue portals]] after [[The Campfire]] area on [[Other Game Features#Looping|loops]]. |
*Can spawn through [[Pickups and Props#Special Props|blue portals]] after [[The Campfire]] area on [[Other Game Features#Looping|loops]]. |
||
| style="text-align: center;" | |
| style="text-align: center;" | |
||
| − | <p style="text-align: center;">Projectile: 4-16</p> |
+ | <p style="text-align: center;">Projectile: 4-16 Damage</p> |
| − | <p style="text-align: center;">Plasma Explosion: 10-20</p> |
+ | <p style="text-align: center;">Plasma Explosion: 10-20 Damage</p> |
| style="text-align: center;" |1st loop HP: 105 |
| style="text-align: center;" |1st loop HP: 105 |
||
| style="text-align: center;" | |
| style="text-align: center;" | |
||
| Line 1,098: | Line 1,098: | ||
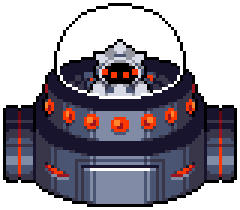
*Boss of the [[I.D.P.D. Headquarters|I.D.P.D. HQ]] secret area. |
*Boss of the [[I.D.P.D. Headquarters|I.D.P.D. HQ]] secret area. |
||
*Sits behind a giant desk. Damaging it will start the bossfight. |
*Sits behind a giant desk. Damaging it will start the bossfight. |
||
| − | *Takes |
+ | *Takes the shape of a fist and charges at the player, breaking walls along the way. |
*Teleports and afterwards shoots a blue orb that splits into blue bullets after hitting a wall. |
*Teleports and afterwards shoots a blue orb that splits into blue bullets after hitting a wall. |
||
*When stationary, she will shoot out projectiles in two different patterns. One around herself and one in an arc in the player's direction. |
*When stationary, she will shoot out projectiles in two different patterns. One around herself and one in an arc in the player's direction. |
||
| Line 1,104: | Line 1,104: | ||
Bullet: 3 Damage |
Bullet: 3 Damage |
||
| − | Orb: |
+ | Orb: 12 Damage |
Melee: 10 Damage |
Melee: 10 Damage |
||
| Line 1,423: | Line 1,423: | ||
</div></div> |
</div></div> |
||
</div> |
</div> |
||
| + | |||
==Damage explanation== |
==Damage explanation== |
||
| Line 1,436: | Line 1,437: | ||
*'''''Melee Attack ''-''' ''Melee swing attack that is able to reflect your projectiles and grenades. The reflected projectiles won't hurt your character but will hurt enemies. Reflected grenades will deal contact damage only to enemies but the explosion can still hurt you.'' |
*'''''Melee Attack ''-''' ''Melee swing attack that is able to reflect your projectiles and grenades. The reflected projectiles won't hurt your character but will hurt enemies. Reflected grenades will deal contact damage only to enemies but the explosion can still hurt you.'' |
||
| − | <div style="position:fixed; right:5px; bottom:5px; overflow:visible">[[File:TOP.png|link=#top|Enemies]] |
+ | <div style="position:fixed; right:5px; bottom:5px; overflow:visible">[[File:TOP.png|link=#top|Enemies]]</div> |
Revision as of 03:36, 5 May 2021
List of enemies including Bosses, sorted by the area in which they make their first appearance.
As you progress the game's difficulty increases. Difficulty is the number of portals you entered; it determines the amount of enemies spawning in the area and which weapons start to drop from Weapon Chests and enemies. Entering a Crown Vault or the Sewers Secret Area counts as entering a portal and increases the difficulty by one each time you exit them, so you get better weapons sooner but there are more enemies.
HP of Bosses and other Enemies changes depending on loops/amount of players. Each loop increases the HP of all enemies by 5%. HP of Bosses first increases by 33%, then by 5%. Each additional player increases the HP of Bosses by 50%.
The Drops on death column contains the guaranteed number of Rads (Radiation) that each enemy drops when it dies. It also contains the max number of other things that can drop from each enemy. Most enemies have a chance to drop a Pickup (Mini Ammo Chest or Mini Medkit), some can drop two at once. There are also a few enemies that can rarely drop a weapon. However taking the Crown of Guns gives all enemies at least an 8% chance to drop a weapon.
Progression Areas
Desert
| Enemy | Description | Damage type and amount | Hit Points | Drops on death |
|---|---|---|---|---|
 |
|
Projectile: 3 Damage |
HP: 4 |
Rads: 2 1 Pickup |
|
Melee: 1 Damage |
HP: 2 | Rads: 1 | |
|
Melee: 1 Damage |
HP: 2 | Rads: 2 | |
 |
|
Melee: 1 Damage |
HP: 22 |
Rads: 10 1 Weapon |
 |
|
None | HP: 12 |
Rads: 5 1 Pickup 1 Weapon |
 |
|
Projectile: 2 Damage Melee: 5 Damage |
HP: 15 |
Rads: 10 1 Pickup |
 |
|
Projectile: 2 Damage Melee: 5 Damage |
HP: 37 |
Rads: 30 1 Pickup 1 Weapon |
 |
|
Projectile: 3 Damage Charge: 10 Damage |
HP: 100 |
Rads: 30 2 Pickups |
Sewers
| Enemy | Description | Damage type and amount | Hit Points | Drops on death |
|---|---|---|---|---|
 |
|
Melee: 2 Damage | HP: 7 |
Rads: 4 |
 |
|
Melee: 2 Damage | HP: 4 |
Rads: 0 1 Pickup |
 |
|
Melee: 1 Damage Charge: 5 Damage |
HP: 35 |
Rads: 20 1 Pickup 1 Weapon |
 |
|
Projectile: 2 Damage |
HP: 5 |
Rads: 5 1 Pickup |
 |
|
Projectile: 2 Damage Toxin: 3 Damage |
HP: 21 |
Rads: 8 1 Pickup |
 |
|
Projectile: 1 Damage | HP: 12 |
Rads: 8 1 Pickup |

|
|
Orb Projectile: 4 Damage Orb Projectile Pellets: 1 Damage |
HP: 30 |
Rads: 12 1 Pickup |
 |
|
Melee Attack: 5 Damage |
HP: 7 |
Rads: 8 Rads (With Sleeping): 16 1 Pickup |
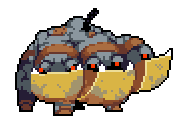
Scrapyard
| Enemy | Description | Damage type and amount | Hit Points | Drops on death |
|---|---|---|---|---|
 |
|
Projectile: 3 Damage | HP: 10 |
Rads: 4 1 Pickup |
 |
|
Projectile: 3 Damage Death: Explosive Damage |
HP: 6 |
Rads: 8 1 Pickup |
 |
|
Fire: 1 Damage per hit
Melee: 1 Damage |
HP: 25 |
Rads: 12 1 Pickup 1 Weapon |
 |
|
Projectile: 3 Damage Homing Missles: 5 Melee Damage + Explosive Damage Death: Explosive Damage |
HP: 300 |
Rads: 90 1 Weapon |
Crystal Caves
| Enemy | Description | Damage type and amount | Hit Points | Drops on death |
|---|---|---|---|---|
 |
Melee: 3 Damage | HP: 18 |
Rads: 9 1 Pickup 1 Weapon | |
 |
|
Laser: 1 Damage per frame (up to 2 Damage, or more) Melee: 20 Damage |
HP: 45 |
Rads: 22 1 Pickup 1 Weapon |
 |
|
Lightning: 2 Damage per hit Melee: 20 Damage |
HP: 45 |
Rads: 25 1 Pickup 1 Weapon |
Frozen City
| Enemy | Description | Damage type and amount | Hit Points | Drops on death |
|---|---|---|---|---|
 |
Projectile: 3 Damage | HP: 8 |
Rads: 4 1 Pickup | |
 |
|
Projectile: 3 Damage Melee: 2 Damage |
HP: 12 |
Rads: 6 |
 |
|
Melee: 4 Damage | HP: 15 |
Rads: 5 1 Pickup 1 Weapon |
 |
|
Projectile: 3 Damage Death: Explosive Damage |
HP: 50 |
Rads: 10 2 Pickups |
 |
|
Projectile: 3 Damage Missile: 4 Damage on contact + Explosive Damage Death: Explosive Damage |
HP: 70 |
Rads: 13 2 Pickups |
 |
|
Short Distance Projectile: 3 Damage Long Distance Projectile: 3 Damage Fire: 1 Damage per hit Death: Explosive Damage |
HP: 140 |
Rads: 20 1 Pickup |
Labs
| Enemy | Description | Damage type and amount | Hit Points | Drops on death |
|---|---|---|---|---|
 |
|
Melee: 3 Damage |
HP: 7 |
Rads: 1 1 Pickup |
 |
|
Melee: 2 Damage Death: Explosive Damage |
HP: 5 |
Rads: 10 1 Pickup |
 |
|
Melee: 5 Damage | HP: 80 |
Rads: 20 1 Pickup 1 Weapon |
 |
|
None | HP: 6 |
Rads: 8 1 Pickup |
 |
|
Projectile: 3 Damage | HP: 40 |
Rads: 2 1 Pickup |
The Palace
| Enemy | Description | Damage type and amount | Hit Points | Drops on death |
|---|---|---|---|---|
 |
|
Projectile: 5 Damage Melee: 2 Damage |
HP: 35 |
Rads: 11 1 Pickup |
 |
|
Projectile: 2 Damage Melee: 2 Damage |
HP: 50 |
Rads: 18 1 Weapon |
 |
|
Melee: 6 Damage |
HP: 160 |
Rads: 24 2 Pickups |
| Enemy | Description | Damage type and amount | Hit Points | Drops on death |
|---|---|---|---|---|
 |
|
Large Laser Beam: 5 Damage Bullet: 2 Damage Orb: 5 Damage Large Orb: 12 Damage Melee: 10 Damage Death: Explosive Damage |
HP: 1500 |
Rads: 500
1 Pickup |
Special Areas
Crown Vault
| Enemy | Description | Damage type and amount | Hit Points | Drops on death |
|---|---|---|---|---|
 |
|
Orb: 5 Damage Large Orb: 12 Damage |
HP: 70 |
Rads: 12 1 Pickup
Large Orb: 1 Pickup |
I.D.P.D.
| Enemy | Description | Damage type and amount | Hit Points | Drops on death |
|---|---|---|---|---|
 |
|
Projectile: 3 Damage Grenade: Explosive Damage |
HP: 8 |
Rads: 0 1 Pickup |
 |
|
Projectile: 5 Damage Grenade: Explosive Damage |
HP: 10 |
Rads: 0 1 Pickup |
 |
|
Projectile: 3 Damage | HP: 45 |
Rads: 0 1 Pickup |
Loop-exclusive I.D.P.D.
| Enemy | Description | Damage type and amount | Hit Points | Drops on death |
|---|---|---|---|---|
 |
|
Melee: 20 Damage Death: Explosive Damage |
1st loop HP: 262 |
Rads: 0 3 Pickups |
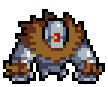
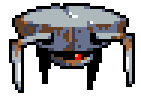
Elite I.D.P.D.
| Enemy | Description | Damage type and amount | Hit Points | Drops on death |
|---|---|---|---|---|
 |
|
Projectile: 3 Damage Missile: 4 Damage on contact + Explosive Damage |
1st loop HP: 42 |
Rads: 0 1 Pickup |
 |
|
Melee Attack: 8 Damage Grenade: Explosive Damage |
1st loop HP: 42 |
Rads: 0 1 Pickup |
 |
|
Projectile: 4-16 Damage Plasma Explosion: 10-20 Damage |
1st loop HP: 105 |
Rads: 0 1 Pickup |
Mutated I.D.P.D.
| Enemy | Description | Damage type and amount | Hit Points | Drops on death |
|---|---|---|---|---|
 |
|
Melee: 5 Damage Projectile: 3 Damage Grenade: Explosive Damage |
3rd loop HP: 34 |
Rads: 25 1 Pickup |
Loop-exclusive Bosses
The Campfire
| Enemy | Description | Damage type and amount | Hit Points | Drops on death |
|---|---|---|---|---|
 |
|
Projectile: 2 Damage Orb: 5 Damage Large Orb: 12 Damage Melee: 10 Damage |
1st loop HP: 880 |
Rads: 70
Large Orb: 1 Pickup |
Sewers
| Enemy | Description | Damage type and amount | Hit Points | Drops on death |
|---|---|---|---|---|
 |
|
Toxic Projectile: 3 Damage Impact: 5 Damage Toxin: 3 Damage Projectiles on death: 2 Damage Melee: 10 Damage |
1st loop HP: 490 |
Rads: 100 1 Pickup |
Crystal Caves
| Enemy | Description | Damage type and amount | Hit Points | Drops on death |
|---|---|---|---|---|
 |
|
Melee: 200 Damage |
1st loop HP: 770 |
Rads: 150 1 Pickup 1 Weapon |
Labs
| Enemy | Description | Damage type and amount | Hit Points | Drops on death |
|---|---|---|---|---|
 |
|
None | 1st loop HP: 490 |
Rads: 50 2 Pickups |
I.D.P.D. Headquarters
| Enemy | Description | Damage type and amount | Hit Points | Drops on death |
|---|---|---|---|---|
 |
|
Bullet: 3 Damage Orb: 12 Damage Melee: 10 Damage |
1st loop HP: 1540 |
Rads: 0 Orb: 1 Pickup |
Secret Enemies
| Enemy | Description | Damage type and amount | Hit Points | Drops on death |
|---|---|---|---|---|
 |
|
Melee: 3 Damage |
HP: 12 |
Rads: 6 2 Pickups |
 |
Melee: 4 Damage | HP: 15 |
Rads: 15 2 Pickups | |
 |
|
Projectile: 1 Damage Melee: 4 Damage |
HP: 60 |
Rads: up to 115 |
Oasis
| Enemy | Description | Damage type and amount | Hit Points | Drops on death |
|---|---|---|---|---|
 |
|
Melee: 2 Damage |
HP: 6 |
Rads: 2 |
 |
|
Projectile: 2 Damage Melee: 3 Damage |
HP: 12 |
Rads: 3 1 Pickup |
Pizza Sewers
| Enemy | Description | Damage type and amount | Hit Points | Drops on death |
|---|---|---|---|---|
 |
|
Melee: 4 Damage |
HP: 15 |
Rads: 12 1 Pickup |
Y.V's Mansion
| Enemy | Description | Damage type and amount | Hit Points | Drops on death |
|---|---|---|---|---|
 |
|
Projectile: 3 Damage | HP: 6 |
Rads: 3 1 Pickup |
 |
Projectile: 1 Damage | HP: 14 |
Rads: 6 1 Pickup | |
 |
|
Projectile: 3 Damage | HP: 25 |
Rads: 5 1 Weapon |
 |
|
Projectile: 3 Damage Melee: 1 Damage |
HP: 60 |
Rads: 15 1 Pickup |
 |
|
Missile: 4 Damage on contact + Explosive Damage Melee: 2 Damage |
HP: 25 |
Rads: 8 1 Pickup |
Cursed Crystal Caves
| Enemy | Description | Damage type and amount | Hit Points | Drops on death |
|---|---|---|---|---|
 |
|
Melee: 3 Damage | HP: 18 |
Rads: 20 1 Pickup |
 |
|
Laser: 1 Damage per frame (up to 2 Damage, or more) Melee: 20 Damage |
HP: 45 |
Rads: 25 1 Pickup |
Jungle
| Enemy | Description | Damage type and amount | Hit Points | Drops on death |
|---|---|---|---|---|
 |
Projectile: 1 Damage |
HP: 9 |
Rads: 5 1 Pickup | |
 |
|
Melee Attack: 5 Damage |
HP: 12 |
Rads: 8 1 Pickup |
 |
Melee: 5 Damage Melee: 1 Damage |
HP: 40 |
Rads: 10 1 Weapon |
Damage explanation
Explosive Damage*:
- Big Explosion - Bigger version of the regular explosion. Deals 5 damage if hit by a single instance of an explosive blast but it's easy to be hit two times by standing close to the explosion's center. This can deal 10 damage instantly.
- Small Explosion - Smaller version of the regular explosion. Has less range than a Big Explosion but deals the same amount of damage.
- Green Explosion - Has the same range as a regular Big Explosion but deals much more damage. Deals 12 damage if hit by a single instance of an explosive blast but it's easy to be hit two times by standing close to the explosion's center. This can deal 24 damage instantly.
- I.D.P.D. Explosion - Large blue explosion created by I.D.P.D. grenades. Deals 8 damage if hit by a single instance of an explosive blast but it's easy to be hit two times by standing close to the explosion's center. This can deal 16 damage instantly.
- Melee Attack - Melee swing attack that is able to reflect your projectiles and grenades. The reflected projectiles won't hurt your character but will hurt enemies. Reflected grenades will deal contact damage only to enemies but the explosion can still hurt you.