(→Labs) |
(→Sewers) Tag: Visual edit |
||
| (29 intermediate revisions by 9 users not shown) | |||
| Line 5: | Line 5: | ||
'''''HP of Bosses and other Enemies''' changes depending on loops/amount of players. Each loop increases the HP of all enemies by 5%. HP of Bosses first increases by 33%, then by 5%. Each additional player increases the HP of Bosses by 50%.'' |
'''''HP of Bosses and other Enemies''' changes depending on loops/amount of players. Each loop increases the HP of all enemies by 5%. HP of Bosses first increases by 33%, then by 5%. Each additional player increases the HP of Bosses by 50%.'' |
||
| − | ''The '''Drops on death''' column contains the guaranteed number of Rads ([[Pickups and Props#Radiation|Radiation]]) that each enemy drops when it dies. It also contains the max number of other things that can drop from each enemy. Most enemies have a chance to drop a Pickup ([[Pickups and Props#Ammo Chests|Mini Ammo Chest]] or [[Pickups and Props#Medkits|Mini Medkit]]), some can drop two at once. There are also a few enemies that can rarely drop a [[Weapons|weapon]]. However taking the [[Crowns#Crown of Guns|Crown of Guns]] gives all enemies |
+ | ''The '''Drops on death''' column contains the guaranteed number of Rads ([[Pickups and Props#Radiation|Radiation]]) that each enemy drops when it dies. It also contains the max number of other things that can drop from each enemy. Most enemies have a chance to drop a Pickup ([[Pickups and Props#Ammo Chests|Mini Ammo Chest]] or [[Pickups and Props#Medkits|Mini Medkit]]), some can drop two at once. There are also a few enemies that can rarely drop a [[Weapons|weapon]]. However taking the [[Crowns#Crown of Guns|Crown of Guns]] gives all enemies at least an 8% chance to drop a weapon.'' |
==[[Areas#Progression Areas|Progression Areas]]== |
==[[Areas#Progression Areas|Progression Areas]]== |
||
===[[Desert]]=== |
===[[Desert]]=== |
||
| Line 120: | Line 120: | ||
<p style="text-align: center;">Charge: 10 Damage</p> |
<p style="text-align: center;">Charge: 10 Damage</p> |
||
| |
| |
||
| − | <p style="text-align: center;"> |
+ | <p style="text-align: center;">HP: 100</p> |
| − | </p> |
||
| − | <p style="text-align: center;">HP:</p> |
||
| − | <p style="text-align: center;">100 </p> |
||
| style="text-align: center;" | |
| style="text-align: center;" | |
||
Rads: 30 |
Rads: 30 |
||
| Line 202: | Line 199: | ||
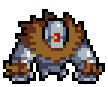
*Loves toxic gas, heals itself with it. |
*Loves toxic gas, heals itself with it. |
||
*Explodes into 20 green projectiles and releases a toxic cloud, when killed or when it comes into contact with the player. |
*Explodes into 20 green projectiles and releases a toxic cloud, when killed or when it comes into contact with the player. |
||
| − | *Unlike the regular Ballguy, it breaks walls near it's |
+ | *Unlike the regular Ballguy, it breaks walls near it's location of death. |
| |
| |
||
| Line 216: | Line 213: | ||
![[File:Gator_idle_new.gif|link=http://nuclear-throne.wikia.com/wiki/Alligator|centre]]<p style="text-align: center;">[[Alligator]]</p> |
![[File:Gator_idle_new.gif|link=http://nuclear-throne.wikia.com/wiki/Alligator|centre]]<p style="text-align: center;">[[Alligator]]</p> |
||
| |
| |
||
| − | *Uses a [[Weapons#Pellets|Shotgun]] that shoots 6 red |
+ | *Uses a [[Weapons#Pellets|Shotgun]] that shoots 6 red pellets. |
*Tries to shoot at the player from behind cover. |
*Tries to shoot at the player from behind cover. |
||
*Spawns more often on the glowing ground. |
*Spawns more often on the glowing ground. |
||
| − | | style="text-align: center;" |Projectile |
+ | | style="text-align: center;" |Projectile: 1 Damage |
| style="text-align: center;" |HP: 12 |
| style="text-align: center;" |HP: 12 |
||
| style="text-align: center;" | |
| style="text-align: center;" | |
||
| Line 232: | Line 229: | ||
*Stronger and more aggressive version of the [[Alligator]]. |
*Stronger and more aggressive version of the [[Alligator]]. |
||
*Uses a [[Weapons#Pellets|Flak Cannon]]. |
*Uses a [[Weapons#Pellets|Flak Cannon]]. |
||
| − | *Fires a small red orb that, after traveling a short distance or hitting a wall, splits into 10 red |
+ | *Fires a small red orb that, after traveling a short distance or hitting a wall, splits into 10 red pellets which spray outward in a circular radius. |
*Spawns more often on the glowing ground. |
*Spawns more often on the glowing ground. |
||
| style="text-align: center;" | |
| style="text-align: center;" | |
||
Orb Projectile: 4 Damage |
Orb Projectile: 4 Damage |
||
| − | Orb |
+ | Orb Projectile Pellets: 1 Damage |
| style="text-align: center;" |HP: 30 |
| style="text-align: center;" |HP: 30 |
||
| style="text-align: center;" | |
| style="text-align: center;" | |
||
| Line 372: | Line 369: | ||
*Does not actively pursue the player; moves randomly. |
*Does not actively pursue the player; moves randomly. |
||
| |
| |
||
| − | <p style="text-align: center;">Laser: 1 Damage per |
+ | <p style="text-align: center;">Laser: 1 Damage per frame (up to 2 Damage, or more)</p> |
| − | <p style="text-align: center;">Melee: |
+ | <p style="text-align: center;">Melee: 20 Damage</p> |
| style="text-align: center;" |HP: 45 |
| style="text-align: center;" |HP: 45 |
||
| style="text-align: center;" | |
| style="text-align: center;" | |
||
| Line 385: | Line 382: | ||
![[File:Lightning_Crystal_idle.gif|link=http://nuclear-throne.wikia.com/wiki/Lightning_Crystal|centre]]<p style="text-align: center;">[[Lightning Crystal]]</p> |
![[File:Lightning_Crystal_idle.gif|link=http://nuclear-throne.wikia.com/wiki/Lightning_Crystal|centre]]<p style="text-align: center;">[[Lightning Crystal]]</p> |
||
| |
| |
||
| − | *Spawns only |
+ | *Spawns only after [[Other_Game_Features#Looping|looping]]. |
*Constantly emits red lightning. |
*Constantly emits red lightning. |
||
*Turns red when charging. |
*Turns red when charging. |
||
| Line 395: | Line 392: | ||
<p style="text-align: center;">Lightning: 2 Damage per hit</p> |
<p style="text-align: center;">Lightning: 2 Damage per hit</p> |
||
| − | <p style="text-align: center;">Melee: |
+ | <p style="text-align: center;">Melee: 20 Damage</p> |
| style="text-align: center;" |HP: 45 |
| style="text-align: center;" |HP: 45 |
||
| style="text-align: center;" | |
| style="text-align: center;" | |
||
| Line 431: | Line 428: | ||
| |
| |
||
*Shoots 3 red projectiles in a small spread. |
*Shoots 3 red projectiles in a small spread. |
||
| − | *Does damage |
+ | *Does melee damage. |
*Doesn't drop [[Pickups and Props|pickups]]. |
*Doesn't drop [[Pickups and Props|pickups]]. |
||
| |
| |
||
| Line 446: | Line 443: | ||
| |
| |
||
*Charges at the player on sight, moves incredibly fast. |
*Charges at the player on sight, moves incredibly fast. |
||
| − | *Does no damage |
+ | *Does no melee damage, only when charging. |
*Can pick up and throw [[Pickups and Props#Frozen City|cars]]. |
*Can pick up and throw [[Pickups and Props#Frozen City|cars]]. |
||
| style="text-align: center;" |Melee: 4 Damage |
| style="text-align: center;" |Melee: 4 Damage |
||
| Line 479: | Line 476: | ||
* Unlike the regular [[Snow Tank]], the Golden Snow Tank will immediately attack the player if they get too close. |
* Unlike the regular [[Snow Tank]], the Golden Snow Tank will immediately attack the player if they get too close. |
||
* Reduced lock-on duration. Shoots faster but shorter bursts. |
* Reduced lock-on duration. Shoots faster but shorter bursts. |
||
| − | * Shoots two streams of red projectiles in one of 2 V-patterns, the first going in-to-out the second going out-to-in, it rarely does the second |
+ | * Shoots two streams of red projectiles in one of 2 V-patterns, the first going in-to-out the second going out-to-in, it rarely does the second pattern. |
* Fires a golden rocket between the projectile trails. |
* Fires a golden rocket between the projectile trails. |
||
*Explodes on death after a short delay, creating two big explosions and four small explosions. |
*Explodes on death after a short delay, creating two big explosions and four small explosions. |
||
| Line 485: | Line 482: | ||
<p style="text-align: center;">Projectile: 3 Damage</p> |
<p style="text-align: center;">Projectile: 3 Damage</p> |
||
| − | <p style="text-align: center;">Missile: 4 Damage on |
+ | <p style="text-align: center;">Missile: 4 Damage on contact + [[Enemies#Damage explanation|Explosive Damage]]</p> |
<p style="text-align: center;">Death: [[Enemies#Damage_explanation|Explosive Damage]]</p> |
<p style="text-align: center;">Death: [[Enemies#Damage_explanation|Explosive Damage]]</p> |
||
| Line 569: | Line 566: | ||
*Has the ability to revive fallen [[Freak]]s. |
*Has the ability to revive fallen [[Freak]]s. |
||
*Can also turn other enemy corpses and [[Pickups and Props#Destructible Objects|destroyed objects]] into living [[Freak]]s. |
*Can also turn other enemy corpses and [[Pickups and Props#Destructible Objects|destroyed objects]] into living [[Freak]]s. |
||
| − | | style="text-align: center;" | |
+ | | style="text-align: center;" |None |
| style="text-align: center;" |HP: 6 |
| style="text-align: center;" |HP: 6 |
||
| style="text-align: center;" | |
| style="text-align: center;" | |
||
| Line 658: | Line 655: | ||
| |
| |
||
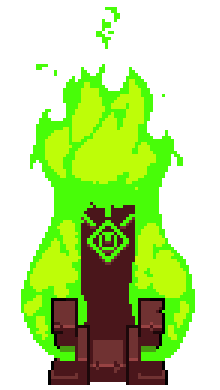
*Final Boss of the game. |
*Final Boss of the game. |
||
| − | *Shoots a large green laser |
+ | *Shoots a large green laser once activated, it kills instantly upon contact. |
* Fires 2 tri-shot bursts green bullets. |
* Fires 2 tri-shot bursts green bullets. |
||
* Shoots two large green orbs that explode into smaller green orbs in a star pattern. Large orbs can break [[Pickups and Props#The Palace|Throne Statues]] which spawn [[Guardian]]s. |
* Shoots two large green orbs that explode into smaller green orbs in a star pattern. Large orbs can break [[Pickups and Props#The Palace|Throne Statues]] which spawn [[Guardian]]s. |
||
| − | * Does 10 damage on contact even when stationary. Walks forwards if you back up too far, |
+ | * Does 10 damage on contact even when stationary. Walks forwards if you back up too far, try to hide back of walls, or go to the sides or top of [[The Nuclear Throne|the Nuclear Throne]], will start shoot a lots of large orbs, that also breaks [[Pickups and Props#Throne Statue|Throne Statues]], and try to catch you. |
| − | *Crates a massive explosion on death which mostly consists of big green explosions. |
+ | *Crates a massive explosion on death which mostly consists of big [[Enemies#Damage_explanation|green explosions]]. |
<div class="mw-collapsible mw-collapsed" data-expandtext="Show Spoiler" data-collapsetext="Hide Spoiler"> |
<div class="mw-collapsible mw-collapsed" data-expandtext="Show Spoiler" data-collapsetext="Hide Spoiler"> |
||
| Line 669: | Line 666: | ||
| − | * Destroying all 4 [[Pickups and Props#The Palace|Large Generator]] props removes half of it's remaining HP and guarantees that a [[Pickups and Props#Special Props|Loop Portal]] opens after |
+ | * Destroying all 4 [[Pickups and Props#The Palace|Large Generator]] props removes half of it's remaining HP and guarantees that a [[Pickups and Props#Special Props|Loop Portal]] opens after Throne is defeated. |
</div> |
</div> |
||
</div> |
</div> |
||
| Line 683: | Line 680: | ||
Melee: 10 Damage |
Melee: 10 Damage |
||
| − | Death: [[Enemies#Damage_explanation|Explosive Damage |
+ | Death: [[Enemies#Damage_explanation|Explosive Damage]] |
| style="text-align: center;" |HP: 1500 |
| style="text-align: center;" |HP: 1500 |
||
| style="text-align: center;" | |
| style="text-align: center;" | |
||
| Line 717: | Line 714: | ||
*Teleports. |
*Teleports. |
||
*Destroys walls on death. |
*Destroys walls on death. |
||
| − | * |
+ | *Doesn't cause melee damage. |
| style="text-align: center;" | |
| style="text-align: center;" | |
||
Orb: 5 Damage |
Orb: 5 Damage |
||
| Line 770: | Line 767: | ||
*Can draw the player towards itself, much like [[Eyes]]. |
*Can draw the player towards itself, much like [[Eyes]]. |
||
*Uses an [[I.D.P.D.]] version of the [[Weapons#Slugs|Slugger]] that shoots a fast, far reaching blue slug. |
*Uses an [[I.D.P.D.]] version of the [[Weapons#Slugs|Slugger]] that shoots a fast, far reaching blue slug. |
||
| − | *Throws blue I.D.P.D. |
+ | *Throws blue [[I.D.P.D.]] grenades, max capacity of 4. |
*Spawns through a [[Pickups and Props#Special Props|blue portal]]. |
*Spawns through a [[Pickups and Props#Special Props|blue portal]]. |
||
| |
| |
||
| Line 810: | Line 807: | ||
*Unloads [[I.D.P.D.]] troops. |
*Unloads [[I.D.P.D.]] troops. |
||
*Will teleport in through a large [[Pickups and Props#Special Props|I.D.P.D. portal]], breaking walls and running over everything in it's path including other enemies. |
*Will teleport in through a large [[Pickups and Props#Special Props|I.D.P.D. portal]], breaking walls and running over everything in it's path including other enemies. |
||
| − | *Deals |
+ | *Deals melee damage while moving. |
*Stays stationary after unloading all the I.D.P.D. troops. |
*Stays stationary after unloading all the I.D.P.D. troops. |
||
*When destroyed it creates 3 I.D.P.D. grenade-like explosions and drops up to 3 [[Pickups and Props|pickups]]. |
*When destroyed it creates 3 I.D.P.D. grenade-like explosions and drops up to 3 [[Pickups and Props|pickups]]. |
||
| Line 819: | Line 816: | ||
<div class="mw-collapsible-content"> |
<div class="mw-collapsible-content"> |
||
| − | *Getting behind the |
+ | *Getting behind the [[I.D.P.D. Van]] while it's unloading [[I.D.P.D.]] units and pressing "E" will teleport the player to the [[I.D.P.D. Headquarters|I.D.P.D. HQ]] secret area. |
</div> |
</div> |
||
</div> |
</div> |
||
| |
| |
||
| − | <p style="text-align: center;"> |
+ | <p style="text-align: center;">Melee: 20 Damage</p> |
<p style="text-align: center;">Death: [[Enemies#Damage_explanation|Explosive Damage]]</p> |
<p style="text-align: center;">Death: [[Enemies#Damage_explanation|Explosive Damage]]</p> |
||
| Line 847: | Line 844: | ||
![[File:Elite_Grunt_Idle.gif|link=http://nuclear-throne.wikia.com/wiki/Elite_Grunt|center]]<p style="text-align: center;">[[Elite Grunt]]</p> |
![[File:Elite_Grunt_Idle.gif|link=http://nuclear-throne.wikia.com/wiki/Elite_Grunt|center]]<p style="text-align: center;">[[Elite Grunt]]</p> |
||
| |
| |
||
| − | *Upgraded version of the |
+ | *Upgraded version of the [[Grunt|I.D.P.D. Grunt]]. Moves quickly and erratically. |
*Dodge rolls, much like [[Fish]] with [[Mutations#Throne_Butt|Throne Butt]]. |
*Dodge rolls, much like [[Fish]] with [[Mutations#Throne_Butt|Throne Butt]]. |
||
| − | *Uses an I.D.P.D. |
+ | *Uses an [[I.D.P.D.]] version of the [[Weapons#Regular|Assault Rifle]] that shoots fast, small, blue bullets. |
*Fires bursts of 3 bullets at a time. |
*Fires bursts of 3 bullets at a time. |
||
| − | *If they do not have direct line of sight to the player, occasionally fires a very fast missile towards the player that deals 4 impact damage and causes a blue I.D.P.D. |
+ | *If they do not have direct line of sight to the player, occasionally fires a very fast missile towards the player that deals 4 impact damage and causes a blue [[I.D.P.D.]] grenade-like explosion on impact, large enough to go through thin walls. |
| − | *Can spawn through [[Pickups and Props#Special Props|blue portals]] after [[ |
+ | *Can spawn through [[Pickups and Props#Special Props|blue portals]] after [[The Campfire]] area on [[Other Game Features#Looping|loops]]. |
| |
| |
||
<p style="text-align: center;">Projectile: 3 Damage</p> |
<p style="text-align: center;">Projectile: 3 Damage</p> |
||
| − | <p style="text-align: center;">Missile: 4 Damage on |
+ | <p style="text-align: center;">Missile: 4 Damage on contact + [[Enemies#Damage_explanation|Explosive Damage]]</p> |
| style="text-align: center;" |1st loop HP: 42 |
| style="text-align: center;" |1st loop HP: 42 |
||
| style="text-align: center;" | |
| style="text-align: center;" | |
||
| Line 864: | Line 861: | ||
![[File:Elite_Inspector_Idle.gif|link=http://nuclear-throne.wikia.com/wiki/Elite_Inspector|center]]<p style="text-align:center;">[[Elite_Inspector|Elite Inspector]]</p> |
![[File:Elite_Inspector_Idle.gif|link=http://nuclear-throne.wikia.com/wiki/Elite_Inspector|center]]<p style="text-align:center;">[[Elite_Inspector|Elite Inspector]]</p> |
||
| |
| |
||
| − | *Upgraded version of the I.D.P.D. |
+ | *Upgraded version of the [[Inspector|I.D.P.D. Inspector]]. |
*Can draw the player towards itself and push away projectiles much like [[Eyes]] with [[Mutations#Throne_Butt|Throne Butt]]. |
*Can draw the player towards itself and push away projectiles much like [[Eyes]] with [[Mutations#Throne_Butt|Throne Butt]]. |
||
*Very quick and dangerous. |
*Very quick and dangerous. |
||
*Highly erratic movement pattern makes it difficult to kill. |
*Highly erratic movement pattern makes it difficult to kill. |
||
| − | *Uses an I.D.P.D. |
+ | *Uses an [[I.D.P.D.]] version of the [[Weapons#Energy|Energy Sword]] |
*Attacks the player with a far reaching melee slash that can also reflect their projectiles. |
*Attacks the player with a far reaching melee slash that can also reflect their projectiles. |
||
*Reflected projectiles hurt other enemies, but not the player. |
*Reflected projectiles hurt other enemies, but not the player. |
||
*Plays a short animation right before its melee slash. |
*Plays a short animation right before its melee slash. |
||
*Does not deal damage on physical contact with player. |
*Does not deal damage on physical contact with player. |
||
| − | *Throws blue I.D.P.D. |
+ | *Throws blue [[I.D.P.D.]] grenades. |
| − | *Can spawn through [[Pickups and Props#Special Props|blue portals]] after [[ |
+ | *Can spawn through [[Pickups and Props#Special Props|blue portals]] after [[The Campfire]] area on [[Other Game Features#Looping|loops]]. |
| |
| |
||
<p style="text-align: center;">[[Enemies#Damage_explanation|Melee Attack]]: 8 Damage</p> |
<p style="text-align: center;">[[Enemies#Damage_explanation|Melee Attack]]: 8 Damage</p> |
||
| Line 886: | Line 883: | ||
![[File:Elite_Shielder_Idle.gif|link=http://nuclear-throne.wikia.com/wiki/Elite_Shielder|center]]<p style="text-align:center;">[[Elite_Shielder|Elite Shielder]]</p> |
![[File:Elite_Shielder_Idle.gif|link=http://nuclear-throne.wikia.com/wiki/Elite_Shielder|center]]<p style="text-align:center;">[[Elite_Shielder|Elite Shielder]]</p> |
||
| |
| |
||
| − | *Upgraded version of the |
+ | *Upgraded version of the [[Shielder|I.D.P.D. Shielder]]. |
*Can shield projectiles and teleports afterwards, much like [[Crystal]] with [[Mutations#Throne_Butt|Throne Butt]]. |
*Can shield projectiles and teleports afterwards, much like [[Crystal]] with [[Mutations#Throne_Butt|Throne Butt]]. |
||
| − | *Uses an I.D.P.D. |
+ | *Uses an [[I.D.P.D.]] version of the [[Weapons#Plasma|Plasma Minigun]]. |
*Fires inaccurate bursts of blue plasma projectiles, from 4 to 6 at a time. |
*Fires inaccurate bursts of blue plasma projectiles, from 4 to 6 at a time. |
||
*Each plasma projectile deals damage the same way as [[Weapons#Plasma|Plasma Weapons]] projectiles and causes a Plasma Explosion. |
*Each plasma projectile deals damage the same way as [[Weapons#Plasma|Plasma Weapons]] projectiles and causes a Plasma Explosion. |
||
| − | *Can spawn through [[Pickups and Props#Special Props|blue portals]] after [[ |
+ | *Can spawn through [[Pickups and Props#Special Props|blue portals]] after [[The Campfire]] area on [[Other Game Features#Looping|loops]]. |
| style="text-align: center;" | |
| style="text-align: center;" | |
||
| − | <p style="text-align: center;">Projectile: 4-16</p> |
+ | <p style="text-align: center;">Projectile: 4-16 Damage</p> |
| − | <p style="text-align: center;">Plasma Explosion: 10-20</p> |
+ | <p style="text-align: center;">Plasma Explosion: 10-20 Damage</p> |
| style="text-align: center;" |1st loop HP: 105 |
| style="text-align: center;" |1st loop HP: 105 |
||
| style="text-align: center;" | |
| style="text-align: center;" | |
||
| Line 916: | Line 913: | ||
![[File:IDPD_Freak_Idle.gif|link=http://nuclear-throne.wikia.com/wiki/I.D.P.D._Freak|center]]<p style="text-align: center;">[[I.D.P.D. Freak]]</p> |
![[File:IDPD_Freak_Idle.gif|link=http://nuclear-throne.wikia.com/wiki/I.D.P.D._Freak|center]]<p style="text-align: center;">[[I.D.P.D. Freak]]</p> |
||
| |
| |
||
| − | *Mutated version of the [[Grunt]]. |
+ | *Mutated version of the [[Grunt|I.D.P.D. Grunt]]. |
*Fires 15 blue bullets in a wide, random spread. |
*Fires 15 blue bullets in a wide, random spread. |
||
*Can spawn 3 [[I.D.P.D.]] grenades on death, creating a huge explosion. |
*Can spawn 3 [[I.D.P.D.]] grenades on death, creating a huge explosion. |
||
| − | *Replaces all regular and Elite [[I.D.P.D.]] units during your third [[Other Game Features#Looping|loop]] after [[ |
+ | *Replaces all regular and Elite [[I.D.P.D.]] units during your third [[Other Game Features#Looping|loop]] after [[The Campfire]] area. |
*Resurrects from enemy corpses. The resurrection continuously happens on its own if at least one enemy is left alive on the level. |
*Resurrects from enemy corpses. The resurrection continuously happens on its own if at least one enemy is left alive on the level. |
||
| − | * [[I.D.P.D. Van]]s will unload I.D.P.D. |
+ | * [[I.D.P.D. Van]]s will unload [[I.D.P.D. Freak]]s and instantly explode after that. |
| − | * Drops [[Pickups and Props#Radiation|rads]] unlike any other I.D.P.D |
+ | * Drops [[Pickups and Props#Radiation|rads]] unlike any other [[I.D.P.D.]] unit in the game. |
| |
| |
||
| − | <p style="text-align: center;">Melee: 5 |
+ | <p style="text-align: center;">Melee: 5 Damage</p> |
<p style="text-align: center;">Projectile: 3 Damage</p> |
<p style="text-align: center;">Projectile: 3 Damage</p> |
||
<p style="text-align: center;">Grenade: [[Enemies#Damage_explanation|Explosive Damage]]</p> |
<p style="text-align: center;">Grenade: [[Enemies#Damage_explanation|Explosive Damage]]</p> |
||
| Line 951: | Line 948: | ||
![[File:The_throne_final_mini1.gif|link=http://nuclear-throne.wikia.com/wiki/Throne_II|centre]]<p style="text-align: center;">[[Throne II]]</p> |
![[File:The_throne_final_mini1.gif|link=http://nuclear-throne.wikia.com/wiki/Throne_II|centre]]<p style="text-align: center;">[[Throne II]]</p> |
||
| |
| |
||
| − | *Final Form of [[The |
+ | *Final Form of [[The Nuclear Throne]]. |
| − | *It appears after you kill the last [[I.D.P.D.]] unit in [[The |
+ | *It appears after you kill the last [[I.D.P.D.]] unit in [[The Campfire]] area. |
*Shoots out two types of attacks: one that splits into a star pattern of smaller green orbs and one that shoots out a straight line of closely packed green bullets. |
*Shoots out two types of attacks: one that splits into a star pattern of smaller green orbs and one that shoots out a straight line of closely packed green bullets. |
||
*Circles around your character on bossfight. |
*Circles around your character on bossfight. |
||
| Line 958: | Line 955: | ||
*The game [[Other Game Features#Looping|loops]] back to the [[Desert]] area after defeating the boss. |
*The game [[Other Game Features#Looping|loops]] back to the [[Desert]] area after defeating the boss. |
||
| style="text-align: center;" | |
| style="text-align: center;" | |
||
| ⚫ | |||
| − | Projectiles: |
||
| − | |||
| ⚫ | |||
Orb: 5 Damage |
Orb: 5 Damage |
||
| Line 992: | Line 987: | ||
![[File:bmama_idle.gif|link=http://nuclear-throne.wikia.com/wiki/Mom|centre]]<p style="text-align: center;">[[Mom]]</p> |
![[File:bmama_idle.gif|link=http://nuclear-throne.wikia.com/wiki/Mom|centre]]<p style="text-align: center;">[[Mom]]</p> |
||
| |
| |
||
| − | * Sewers |
+ | * [[Sewers]] area Boss you encounter after [[Other Game Features#Looping|looping]]. |
* She shoots projectiles that spew out toxic clouds. |
* She shoots projectiles that spew out toxic clouds. |
||
* Lays eggs from which [[Ballguy]]s come out, its easy for them to change into [[Toxic Ballguy]]s since they come in contact with toxic clouds more frequently. |
* Lays eggs from which [[Ballguy]]s come out, its easy for them to change into [[Toxic Ballguy]]s since they come in contact with toxic clouds more frequently. |
||
| Line 998: | Line 993: | ||
* Heals when in contact with toxic clouds. |
* Heals when in contact with toxic clouds. |
||
* Explodes when killed, firing 80 projectiles around her location of death. |
* Explodes when killed, firing 80 projectiles around her location of death. |
||
| + | * [[Toxic Ballguy]]s deals 3 toxin damage, instead of 2 damage on [[Mom]] battle. |
||
| style="text-align: center;" | |
| style="text-align: center;" | |
||
| − | Toxic Projectile |
+ | Toxic Projectile: 3 Damage |
Impact: 5 Damage |
Impact: 5 Damage |
||
| − | Toxin: |
+ | Toxin: 3 Damage |
| − | Projectiles on |
+ | Projectiles on death: 2 Damage |
Melee: 10 Damage |
Melee: 10 Damage |
||
| style="text-align: center;" |1st loop HP: 490 |
| style="text-align: center;" |1st loop HP: 490 |
||
| − | | style="text-align: center;" | |
+ | | style="text-align: center;" | |
| + | Rads: 100 |
||
1 Pickup |
1 Pickup |
||
| Line 1,028: | Line 1,025: | ||
![[File:Hyper_Crystal_idle.gif|link=http://nuclear-throne.wikia.com/wiki/Hyper_Crystal|centre]]<p style="text-align: center;">[[Hyper Crystal]]</p> |
![[File:Hyper_Crystal_idle.gif|link=http://nuclear-throne.wikia.com/wiki/Hyper_Crystal|centre]]<p style="text-align: center;">[[Hyper Crystal]]</p> |
||
| |
| |
||
| − | * Crystal Caves |
+ | * [[Crystal Caves]] area Boss you encounter after [[Other Game Features#Looping|looping]]. |
* Surrounded by five [[Laser Crystal]] enemies that constantly circle around the boss. |
* Surrounded by five [[Laser Crystal]] enemies that constantly circle around the boss. |
||
| − | * The Boss itself doesn't have a ranged attack but it will summon more Laser |
+ | * The Boss itself doesn't have a ranged attack but it will summon more [[Laser Crystal]]s if they get destroyed. |
| − | * Expands the |
+ | * Expands the [[Laser Crystal]]s which will then explode, breaking walls and removing your cover. Each explosion creates a fixed pattern of 7 lasers around its center. |
| − | * Does |
+ | * Does 200 melee damage. |
<div class="mw-collapsible mw-collapsed" data-expandtext="Show Spoiler" data-collapsetext="Hide Spoiler"> |
<div class="mw-collapsible mw-collapsed" data-expandtext="Show Spoiler" data-collapsetext="Hide Spoiler"> |
||
| Line 1,039: | Line 1,036: | ||
| − | * If you enter the [[Cursed Crystal Caves]] secret area during a [[Other Game Features#Looping|loop]], the Hyper Crystal |
+ | * If you enter the [[Cursed Crystal Caves]] secret area during a [[Other Game Features#Looping|loop]], the [[Hyper Crystal]] will be surrounded by [[Cursed Laser Crystal]]s. The boss will spawn them instead of regular [[Laser Crystal]]s as they get destroyed. |
* Each crystal the Cursed Hyper Crystal spawns has a 10% chance to be a [[Lightning Crystal]] and a 1% chance to be a [[Cursed Crystal Spider]]. |
* Each crystal the Cursed Hyper Crystal spawns has a 10% chance to be a [[Lightning Crystal]] and a 1% chance to be a [[Cursed Crystal Spider]]. |
||
</div> |
</div> |
||
| Line 1,045: | Line 1,042: | ||
| style="text-align: center;" | |
| style="text-align: center;" | |
||
| − | Melee: |
+ | Melee: 200 Damage |
| style="text-align: center;" | |
| style="text-align: center;" | |
||
| Line 1,071: | Line 1,068: | ||
![[File:Techno_Mancer_idle2.gif|link=http://nuclear-throne.wikia.com/wiki/Technomancer|centre]]<p style="text-align: center;">[[Technomancer]]</p> |
![[File:Techno_Mancer_idle2.gif|link=http://nuclear-throne.wikia.com/wiki/Technomancer|centre]]<p style="text-align: center;">[[Technomancer]]</p> |
||
| |
| |
||
| − | * |
+ | * [[Labs]] area Boss you encounter after [[Other Game Features#Looping|looping]]. |
* Has the ability to turn other enemy's corpses into living [[Necromancer]]s. |
* Has the ability to turn other enemy's corpses into living [[Necromancer]]s. |
||
* Summons [[Turret]]s. |
* Summons [[Turret]]s. |
||
| − | * The |
+ | * The boss itself deals no damage. |
| − | * The Technomancer |
+ | * The [[Technomancer]] jumps between three randomly placed machines. |
* Destroying all three machines kills the boss. |
* Destroying all three machines kills the boss. |
||
| style="text-align: center;" |None |
| style="text-align: center;" |None |
||
| Line 1,101: | Line 1,098: | ||
*Boss of the [[I.D.P.D. Headquarters|I.D.P.D. HQ]] secret area. |
*Boss of the [[I.D.P.D. Headquarters|I.D.P.D. HQ]] secret area. |
||
*Sits behind a giant desk. Damaging it will start the bossfight. |
*Sits behind a giant desk. Damaging it will start the bossfight. |
||
| − | *Takes |
+ | *Takes the shape of a fist and charges at the player, breaking walls along the way. |
*Teleports and afterwards shoots a blue orb that splits into blue bullets after hitting a wall. |
*Teleports and afterwards shoots a blue orb that splits into blue bullets after hitting a wall. |
||
*When stationary, she will shoot out projectiles in two different patterns. One around herself and one in an arc in the player's direction. |
*When stationary, she will shoot out projectiles in two different patterns. One around herself and one in an arc in the player's direction. |
||
| style="text-align: center;" | |
| style="text-align: center;" | |
||
| − | Bullet: 3 Damage |
+ | Bullet: 3 Damage |
| − | Orb: |
+ | Orb: 12 Damage |
Melee: 10 Damage |
Melee: 10 Damage |
||
| Line 1,138: | Line 1,135: | ||
*Looks like an [[Pickups and Props#Chests|Ammo Chest]]. |
*Looks like an [[Pickups and Props#Chests|Ammo Chest]]. |
||
*Can be recognized by a licking tongue. |
*Can be recognized by a licking tongue. |
||
| − | *There is a 10% chance for an ammo chest to become this mimic. |
+ | *There is a 10% chance for an ammo chest to become this [[Mimic|mimic]]. |
| − | *Only chests spawned by level generation can become mimics. |
+ | *Only chests spawned by level generation can become [[Mimic|mimics]]. |
| style="text-align: center;" | |
| style="text-align: center;" | |
||
| Line 1,154: | Line 1,151: | ||
*An elite version of the [[Mimic]]. |
*An elite version of the [[Mimic]]. |
||
* Can be recognized by gnashing teeth. |
* Can be recognized by gnashing teeth. |
||
| − | *There is a 2% chance for a health chest to become this mimic. |
+ | *There is a 2% chance for a health chest to become this [[Health Mimic|mimic]]. |
| − | *Only chests spawned by level generation can become mimics. |
+ | *Only chests spawned by level generation can become [[Health Mimic|mimics]]. |
| style="text-align: center;" |<span style="text-align:center;">Melee: 4 Damage</span> |
| style="text-align: center;" |<span style="text-align:center;">Melee: 4 Damage</span> |
||
| style="text-align: center;" |<span style="text-align:center;">HP: 15</span> |
| style="text-align: center;" |<span style="text-align:center;">HP: 15</span> |
||
| Line 1,166: | Line 1,163: | ||
| |
| |
||
*The enemy version of [[Horror]]. |
*The enemy version of [[Horror]]. |
||
| − | *To fight it, you have to leave two consecutive [[Pickups and Props#Radiation|rad canisters]] unbroken. [[Horror]] will spawn as a mindless enemy breaking out of a Canister |
+ | *To fight it, you have to leave two consecutive [[Pickups and Props#Radiation|rad canisters]] unbroken. [[Horror]] will spawn as a mindless enemy breaking out of a [[Pickups_and_Props#Radiation|Canister]] in the next area, after the one where you left the [[Pickups_and_Props#Radiation|Big Canister]]. |
*Defeating it unlocks [[Horror]] as a playable [[Characters|character]]. |
*Defeating it unlocks [[Horror]] as a playable [[Characters|character]]. |
||
*It fires a beam similar to the [[Horror]] you can play as, a closely packed mass of particles that gets stronger the longer it shoots. It uses 90 [[Pickups and Props#Radiation|Rads]] to do so and can drop all of them on death plus 25 extra ones. |
*It fires a beam similar to the [[Horror]] you can play as, a closely packed mass of particles that gets stronger the longer it shoots. It uses 90 [[Pickups and Props#Radiation|Rads]] to do so and can drop all of them on death plus 25 extra ones. |
||
| Line 1,253: | Line 1,250: | ||
![[File:MoleFishGif.gif|link=http://nuclear-throne.wikia.com/wiki/Mole_Fish|centre]]<p style="text-align: center;">[[Mole Fish]]</p> |
![[File:MoleFishGif.gif|link=http://nuclear-throne.wikia.com/wiki/Mole_Fish|centre]]<p style="text-align: center;">[[Mole Fish]]</p> |
||
| |
| |
||
| − | *Shoots a single bullet, much like a |
+ | *Shoots a single bullet, much like a [[Bandit]]. Slightly higher rate of fire. |
| style="text-align: center;" |Projectile: 3 Damage |
| style="text-align: center;" |Projectile: 3 Damage |
||
| style="text-align: center;" |HP: 6 |
| style="text-align: center;" |HP: 6 |
||
| Line 1,263: | Line 1,260: | ||
![[File:MoleSargeGif.gif|link=http://nuclear-throne.wikia.com/wiki/Mole_Sarge|centre]]<p style="text-align: center;">[[Mole Sarge]]</p> |
![[File:MoleSargeGif.gif|link=http://nuclear-throne.wikia.com/wiki/Mole_Sarge|centre]]<p style="text-align: center;">[[Mole Sarge]]</p> |
||
| |
| |
||
| − | *The stronger version of a Mole Fish. |
+ | *The stronger version of a [[Mole Fish]]. |
| − | * Shoots 5 low range pellets |
+ | * Shoots 5 low range pellets, similar to the [[Alligator]]'s shotgun. |
| style="text-align: center;" |Projectile: 1 Damage |
| style="text-align: center;" |Projectile: 1 Damage |
||
| style="text-align: center;" |HP: 14 |
| style="text-align: center;" |HP: 14 |
||
| Line 1,284: | Line 1,281: | ||
![[File:SuperFireBallerGif.gif|link=http://nuclear-throne.wikia.com/wiki/Super_Fireballer|centre]]<p style="text-align: center;">[[Super Fireballer]]</p> |
![[File:SuperFireBallerGif.gif|link=http://nuclear-throne.wikia.com/wiki/Super_Fireballer|centre]]<p style="text-align: center;">[[Super Fireballer]]</p> |
||
| |
| |
||
| − | *The stronger version of a Fireballer. |
+ | *The stronger version of a [[Fireballer]]. |
*Shoots 3 fireballs out of its mouth with a high fire rate. |
*Shoots 3 fireballs out of its mouth with a high fire rate. |
||
*Has a high amount of health. |
*Has a high amount of health. |
||
| Line 1,299: | Line 1,296: | ||
![[File:JockGif.gif|link=http://nuclear-throne.wikia.com/wiki/Jock|centre]]<p style="text-align: center;">[[Jock]]</p> |
![[File:JockGif.gif|link=http://nuclear-throne.wikia.com/wiki/Jock|centre]]<p style="text-align: center;">[[Jock]]</p> |
||
| |
| |
||
| − | *Fires a |
+ | *Fires a missile from its stomach that builds up speed, much like a bazooka missile. Same explosion radius as a grenade. |
| style="text-align: center;" | |
| style="text-align: center;" | |
||
| − | Missile: 4 Damage on |
+ | Missile: 4 Damage on contact + [[Enemies#Damage_explanation|Explosive Damage]] |
Melee: 2 Damage |
Melee: 2 Damage |
||
| Line 1,328: | Line 1,325: | ||
*Drops more rads than the [[Crystal Spider]]. |
*Drops more rads than the [[Crystal Spider]]. |
||
*Emits purple smoke. |
*Emits purple smoke. |
||
| − | *Has a 25% chance to split in two upon death. These split versions will not drop rads |
+ | *Has a 25% chance to split in two upon death. These split versions will not drop [[Pickups_and_Props#Radiation|rads]] when killed. |
| style="text-align: center;" |Melee: 3 Damage |
| style="text-align: center;" |Melee: 3 Damage |
||
| style="text-align: center;" |HP: 18 |
| style="text-align: center;" |HP: 18 |
||
| Line 1,343: | Line 1,340: | ||
*Every few seconds will teleport over a short distance in random directions. |
*Every few seconds will teleport over a short distance in random directions. |
||
*Charges up and shoots 4 laser beams in a burst at the player. |
*Charges up and shoots 4 laser beams in a burst at the player. |
||
| − | *Each laser does 1 damage per hit animation, up to |
+ | *Each laser does 1 damage per hit animation, up to 4 damage. |
*Long range. |
*Long range. |
||
*Turns red when charging and firing. |
*Turns red when charging and firing. |
||
| Line 1,350: | Line 1,347: | ||
*Instant death when touched. |
*Instant death when touched. |
||
| |
| |
||
| − | <p style="text-align: center;">Laser: 1 Damage per |
+ | <p style="text-align: center;">Laser: 1 Damage per frame (up to 2 Damage, or more)</p> |
<p style="text-align: center;">Melee: 20 Damage</p> |
<p style="text-align: center;">Melee: 20 Damage</p> |
||
| Line 1,392: | Line 1,389: | ||
*Disguises itself as a [[Pickups and Props#Secret Props|Bush]] prop to blend into it's surroundings. |
*Disguises itself as a [[Pickups and Props#Secret Props|Bush]] prop to blend into it's surroundings. |
||
*Very quick and dangerous. |
*Very quick and dangerous. |
||
| − | *Has more HP than regular Assassin. |
+ | *Has more HP than regular [[Assassin]]. |
| − | *Has faster reaction time than regular |
+ | *Has faster reaction time than regular [[Assassin]]s. |
*Highly erratic movement pattern makes it difficult to kill. |
*Highly erratic movement pattern makes it difficult to kill. |
||
*Attacks the player with a far reaching melee weapon that can also reflect your projectiles. |
*Attacks the player with a far reaching melee weapon that can also reflect your projectiles. |
||
| Line 1,409: | Line 1,406: | ||
<p style="text-align:center;">[[Giant Fly]]</p> |
<p style="text-align:center;">[[Giant Fly]]</p> |
||
| |
| |
||
| − | *Flies at the player, dealing 5 damage |
+ | *Flies at the player, dealing 5 melee damage. |
*Spits short streams of 6 maggot projectiles towards the player, which turn into ordinary [[Maggot]]s upon contact with a surface. |
*Spits short streams of 6 maggot projectiles towards the player, which turn into ordinary [[Maggot]]s upon contact with a surface. |
||
*Spawns 6 [[Maggot]]s on death. |
*Spawns 6 [[Maggot]]s on death. |
||
| Line 1,426: | Line 1,423: | ||
</div></div> |
</div></div> |
||
</div> |
</div> |
||
| + | |||
==Damage explanation== |
==Damage explanation== |
||
| Line 1,439: | Line 1,437: | ||
*'''''Melee Attack ''-''' ''Melee swing attack that is able to reflect your projectiles and grenades. The reflected projectiles won't hurt your character but will hurt enemies. Reflected grenades will deal contact damage only to enemies but the explosion can still hurt you.'' |
*'''''Melee Attack ''-''' ''Melee swing attack that is able to reflect your projectiles and grenades. The reflected projectiles won't hurt your character but will hurt enemies. Reflected grenades will deal contact damage only to enemies but the explosion can still hurt you.'' |
||
| − | <div style="position:fixed; right:5px; bottom:5px; overflow:visible">[[File:TOP.png|link=#top|Enemies]] |
+ | <div style="position:fixed; right:5px; bottom:5px; overflow:visible">[[File:TOP.png|link=#top|Enemies]]</div> |
Revision as of 03:36, 5 May 2021
List of enemies including Bosses, sorted by the area in which they make their first appearance.
As you progress the game's difficulty increases. Difficulty is the number of portals you entered; it determines the amount of enemies spawning in the area and which weapons start to drop from Weapon Chests and enemies. Entering a Crown Vault or the Sewers Secret Area counts as entering a portal and increases the difficulty by one each time you exit them, so you get better weapons sooner but there are more enemies.
HP of Bosses and other Enemies changes depending on loops/amount of players. Each loop increases the HP of all enemies by 5%. HP of Bosses first increases by 33%, then by 5%. Each additional player increases the HP of Bosses by 50%.
The Drops on death column contains the guaranteed number of Rads (Radiation) that each enemy drops when it dies. It also contains the max number of other things that can drop from each enemy. Most enemies have a chance to drop a Pickup (Mini Ammo Chest or Mini Medkit), some can drop two at once. There are also a few enemies that can rarely drop a weapon. However taking the Crown of Guns gives all enemies at least an 8% chance to drop a weapon.
Progression Areas
Desert
| Enemy | Description | Damage type and amount | Hit Points | Drops on death |
|---|---|---|---|---|
 |
|
Projectile: 3 Damage |
HP: 4 |
Rads: 2 1 Pickup |
|
Melee: 1 Damage |
HP: 2 | Rads: 1 | |
|
Melee: 1 Damage |
HP: 2 | Rads: 2 | |
 |
|
Melee: 1 Damage |
HP: 22 |
Rads: 10 1 Weapon |
 |
|
None | HP: 12 |
Rads: 5 1 Pickup 1 Weapon |
 |
|
Projectile: 2 Damage Melee: 5 Damage |
HP: 15 |
Rads: 10 1 Pickup |
 |
|
Projectile: 2 Damage Melee: 5 Damage |
HP: 37 |
Rads: 30 1 Pickup 1 Weapon |
 |
|
Projectile: 3 Damage Charge: 10 Damage |
HP: 100 |
Rads: 30 2 Pickups |
Sewers
| Enemy | Description | Damage type and amount | Hit Points | Drops on death |
|---|---|---|---|---|
 |
|
Melee: 2 Damage | HP: 7 |
Rads: 4 |
 |
|
Melee: 2 Damage | HP: 4 |
Rads: 0 1 Pickup |
 |
|
Melee: 1 Damage Charge: 5 Damage |
HP: 35 |
Rads: 20 1 Pickup 1 Weapon |
 |
|
Projectile: 2 Damage |
HP: 5 |
Rads: 5 1 Pickup |
 |
|
Projectile: 2 Damage Toxin: 3 Damage |
HP: 21 |
Rads: 8 1 Pickup |
 |
|
Projectile: 1 Damage | HP: 12 |
Rads: 8 1 Pickup |

|
|
Orb Projectile: 4 Damage Orb Projectile Pellets: 1 Damage |
HP: 30 |
Rads: 12 1 Pickup |
 |
|
Melee Attack: 5 Damage |
HP: 7 |
Rads: 8 Rads (With Sleeping): 16 1 Pickup |
Scrapyard
| Enemy | Description | Damage type and amount | Hit Points | Drops on death |
|---|---|---|---|---|
 |
|
Projectile: 3 Damage | HP: 10 |
Rads: 4 1 Pickup |
 |
|
Projectile: 3 Damage Death: Explosive Damage |
HP: 6 |
Rads: 8 1 Pickup |
 |
|
Fire: 1 Damage per hit
Melee: 1 Damage |
HP: 25 |
Rads: 12 1 Pickup 1 Weapon |
 |
|
Projectile: 3 Damage Homing Missles: 5 Melee Damage + Explosive Damage Death: Explosive Damage |
HP: 300 |
Rads: 90 1 Weapon |
Crystal Caves
| Enemy | Description | Damage type and amount | Hit Points | Drops on death |
|---|---|---|---|---|
 |
Melee: 3 Damage | HP: 18 |
Rads: 9 1 Pickup 1 Weapon | |
 |
|
Laser: 1 Damage per frame (up to 2 Damage, or more) Melee: 20 Damage |
HP: 45 |
Rads: 22 1 Pickup 1 Weapon |
 |
|
Lightning: 2 Damage per hit Melee: 20 Damage |
HP: 45 |
Rads: 25 1 Pickup 1 Weapon |
Frozen City
| Enemy | Description | Damage type and amount | Hit Points | Drops on death |
|---|---|---|---|---|
 |
Projectile: 3 Damage | HP: 8 |
Rads: 4 1 Pickup | |
 |
|
Projectile: 3 Damage Melee: 2 Damage |
HP: 12 |
Rads: 6 |
 |
|
Melee: 4 Damage | HP: 15 |
Rads: 5 1 Pickup 1 Weapon |
 |
|
Projectile: 3 Damage Death: Explosive Damage |
HP: 50 |
Rads: 10 2 Pickups |
 |
|
Projectile: 3 Damage Missile: 4 Damage on contact + Explosive Damage Death: Explosive Damage |
HP: 70 |
Rads: 13 2 Pickups |
 |
|
Short Distance Projectile: 3 Damage Long Distance Projectile: 3 Damage Fire: 1 Damage per hit Death: Explosive Damage |
HP: 140 |
Rads: 20 1 Pickup |
Labs
| Enemy | Description | Damage type and amount | Hit Points | Drops on death |
|---|---|---|---|---|
 |
|
Melee: 3 Damage |
HP: 7 |
Rads: 1 1 Pickup |
 |
|
Melee: 2 Damage Death: Explosive Damage |
HP: 5 |
Rads: 10 1 Pickup |
 |
|
Melee: 5 Damage | HP: 80 |
Rads: 20 1 Pickup 1 Weapon |
 |
|
None | HP: 6 |
Rads: 8 1 Pickup |
 |
|
Projectile: 3 Damage | HP: 40 |
Rads: 2 1 Pickup |
The Palace
| Enemy | Description | Damage type and amount | Hit Points | Drops on death |
|---|---|---|---|---|
 |
|
Projectile: 5 Damage Melee: 2 Damage |
HP: 35 |
Rads: 11 1 Pickup |
 |
|
Projectile: 2 Damage Melee: 2 Damage |
HP: 50 |
Rads: 18 1 Weapon |
 |
|
Melee: 6 Damage |
HP: 160 |
Rads: 24 2 Pickups |
| Enemy | Description | Damage type and amount | Hit Points | Drops on death |
|---|---|---|---|---|
 |
|
Large Laser Beam: 5 Damage Bullet: 2 Damage Orb: 5 Damage Large Orb: 12 Damage Melee: 10 Damage Death: Explosive Damage |
HP: 1500 |
Rads: 500
1 Pickup |
Special Areas
Crown Vault
| Enemy | Description | Damage type and amount | Hit Points | Drops on death |
|---|---|---|---|---|
 |
|
Orb: 5 Damage Large Orb: 12 Damage |
HP: 70 |
Rads: 12 1 Pickup
Large Orb: 1 Pickup |
I.D.P.D.
| Enemy | Description | Damage type and amount | Hit Points | Drops on death |
|---|---|---|---|---|
 |
|
Projectile: 3 Damage Grenade: Explosive Damage |
HP: 8 |
Rads: 0 1 Pickup |
 |
|
Projectile: 5 Damage Grenade: Explosive Damage |
HP: 10 |
Rads: 0 1 Pickup |
 |
|
Projectile: 3 Damage | HP: 45 |
Rads: 0 1 Pickup |
Loop-exclusive I.D.P.D.
| Enemy | Description | Damage type and amount | Hit Points | Drops on death |
|---|---|---|---|---|
 |
|
Melee: 20 Damage Death: Explosive Damage |
1st loop HP: 262 |
Rads: 0 3 Pickups |
Elite I.D.P.D.
| Enemy | Description | Damage type and amount | Hit Points | Drops on death |
|---|---|---|---|---|
 |
|
Projectile: 3 Damage Missile: 4 Damage on contact + Explosive Damage |
1st loop HP: 42 |
Rads: 0 1 Pickup |
 |
|
Melee Attack: 8 Damage Grenade: Explosive Damage |
1st loop HP: 42 |
Rads: 0 1 Pickup |
 |
|
Projectile: 4-16 Damage Plasma Explosion: 10-20 Damage |
1st loop HP: 105 |
Rads: 0 1 Pickup |
Mutated I.D.P.D.
| Enemy | Description | Damage type and amount | Hit Points | Drops on death |
|---|---|---|---|---|
 |
|
Melee: 5 Damage Projectile: 3 Damage Grenade: Explosive Damage |
3rd loop HP: 34 |
Rads: 25 1 Pickup |
Loop-exclusive Bosses
The Campfire
| Enemy | Description | Damage type and amount | Hit Points | Drops on death |
|---|---|---|---|---|
 |
|
Projectile: 2 Damage Orb: 5 Damage Large Orb: 12 Damage Melee: 10 Damage |
1st loop HP: 880 |
Rads: 70
Large Orb: 1 Pickup |
Sewers
| Enemy | Description | Damage type and amount | Hit Points | Drops on death |
|---|---|---|---|---|
 |
|
Toxic Projectile: 3 Damage Impact: 5 Damage Toxin: 3 Damage Projectiles on death: 2 Damage Melee: 10 Damage |
1st loop HP: 490 |
Rads: 100 1 Pickup |
Crystal Caves
| Enemy | Description | Damage type and amount | Hit Points | Drops on death |
|---|---|---|---|---|
 |
|
Melee: 200 Damage |
1st loop HP: 770 |
Rads: 150 1 Pickup 1 Weapon |
Labs
| Enemy | Description | Damage type and amount | Hit Points | Drops on death |
|---|---|---|---|---|
 |
|
None | 1st loop HP: 490 |
Rads: 50 2 Pickups |
I.D.P.D. Headquarters
| Enemy | Description | Damage type and amount | Hit Points | Drops on death |
|---|---|---|---|---|
 |
|
Bullet: 3 Damage Orb: 12 Damage Melee: 10 Damage |
1st loop HP: 1540 |
Rads: 0 Orb: 1 Pickup |
Secret Enemies
| Enemy | Description | Damage type and amount | Hit Points | Drops on death |
|---|---|---|---|---|
 |
|
Melee: 3 Damage |
HP: 12 |
Rads: 6 2 Pickups |
 |
Melee: 4 Damage | HP: 15 |
Rads: 15 2 Pickups | |
 |
|
Projectile: 1 Damage Melee: 4 Damage |
HP: 60 |
Rads: up to 115 |
Oasis
| Enemy | Description | Damage type and amount | Hit Points | Drops on death |
|---|---|---|---|---|
 |
|
Melee: 2 Damage |
HP: 6 |
Rads: 2 |
 |
|
Projectile: 2 Damage Melee: 3 Damage |
HP: 12 |
Rads: 3 1 Pickup |
Pizza Sewers
| Enemy | Description | Damage type and amount | Hit Points | Drops on death |
|---|---|---|---|---|
 |
|
Melee: 4 Damage |
HP: 15 |
Rads: 12 1 Pickup |
Y.V's Mansion
| Enemy | Description | Damage type and amount | Hit Points | Drops on death |
|---|---|---|---|---|
 |
|
Projectile: 3 Damage | HP: 6 |
Rads: 3 1 Pickup |
 |
Projectile: 1 Damage | HP: 14 |
Rads: 6 1 Pickup | |
 |
|
Projectile: 3 Damage | HP: 25 |
Rads: 5 1 Weapon |
 |
|
Projectile: 3 Damage Melee: 1 Damage |
HP: 60 |
Rads: 15 1 Pickup |
 |
|
Missile: 4 Damage on contact + Explosive Damage Melee: 2 Damage |
HP: 25 |
Rads: 8 1 Pickup |
Cursed Crystal Caves
| Enemy | Description | Damage type and amount | Hit Points | Drops on death |
|---|---|---|---|---|
 |
|
Melee: 3 Damage | HP: 18 |
Rads: 20 1 Pickup |
 |
|
Laser: 1 Damage per frame (up to 2 Damage, or more) Melee: 20 Damage |
HP: 45 |
Rads: 25 1 Pickup |
Jungle
| Enemy | Description | Damage type and amount | Hit Points | Drops on death |
|---|---|---|---|---|
 |
Projectile: 1 Damage |
HP: 9 |
Rads: 5 1 Pickup | |
 |
|
Melee Attack: 5 Damage |
HP: 12 |
Rads: 8 1 Pickup |
 |
Melee: 5 Damage Melee: 1 Damage |
HP: 40 |
Rads: 10 1 Weapon |
Damage explanation
Explosive Damage*:
- Big Explosion - Bigger version of the regular explosion. Deals 5 damage if hit by a single instance of an explosive blast but it's easy to be hit two times by standing close to the explosion's center. This can deal 10 damage instantly.
- Small Explosion - Smaller version of the regular explosion. Has less range than a Big Explosion but deals the same amount of damage.
- Green Explosion - Has the same range as a regular Big Explosion but deals much more damage. Deals 12 damage if hit by a single instance of an explosive blast but it's easy to be hit two times by standing close to the explosion's center. This can deal 24 damage instantly.
- I.D.P.D. Explosion - Large blue explosion created by I.D.P.D. grenades. Deals 8 damage if hit by a single instance of an explosive blast but it's easy to be hit two times by standing close to the explosion's center. This can deal 16 damage instantly.
- Melee Attack - Melee swing attack that is able to reflect your projectiles and grenades. The reflected projectiles won't hurt your character but will hurt enemies. Reflected grenades will deal contact damage only to enemies but the explosion can still hurt you.